Camera Mounting Guide on Junction Box (VJB-300)
Multiple mounting holes are available for the installation of various camera types to suit different needs. For a complete list of compatible devices, please visit https://www.tp-link.com/vigi-accessories/product-list/.
Follow the steps below to install your camera.
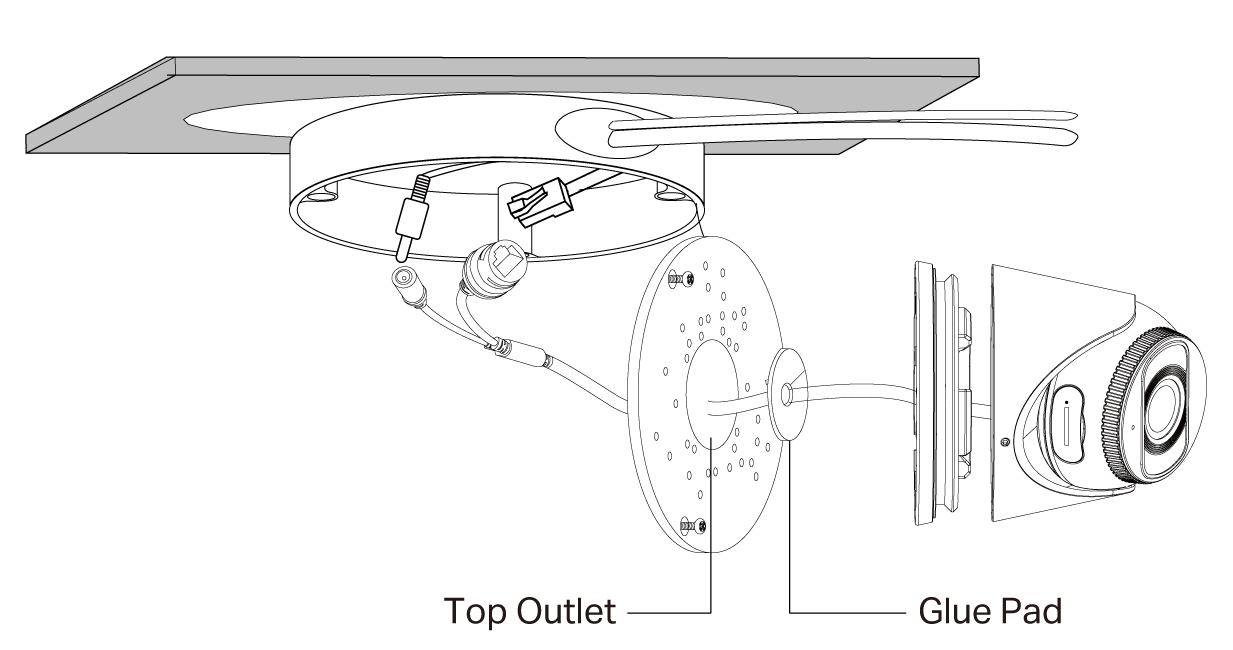
1. Remove the glue pad, thread the camera's cable through the upper outlet, and reapply the pad.
2. Connect the network cable and power cable as needed.
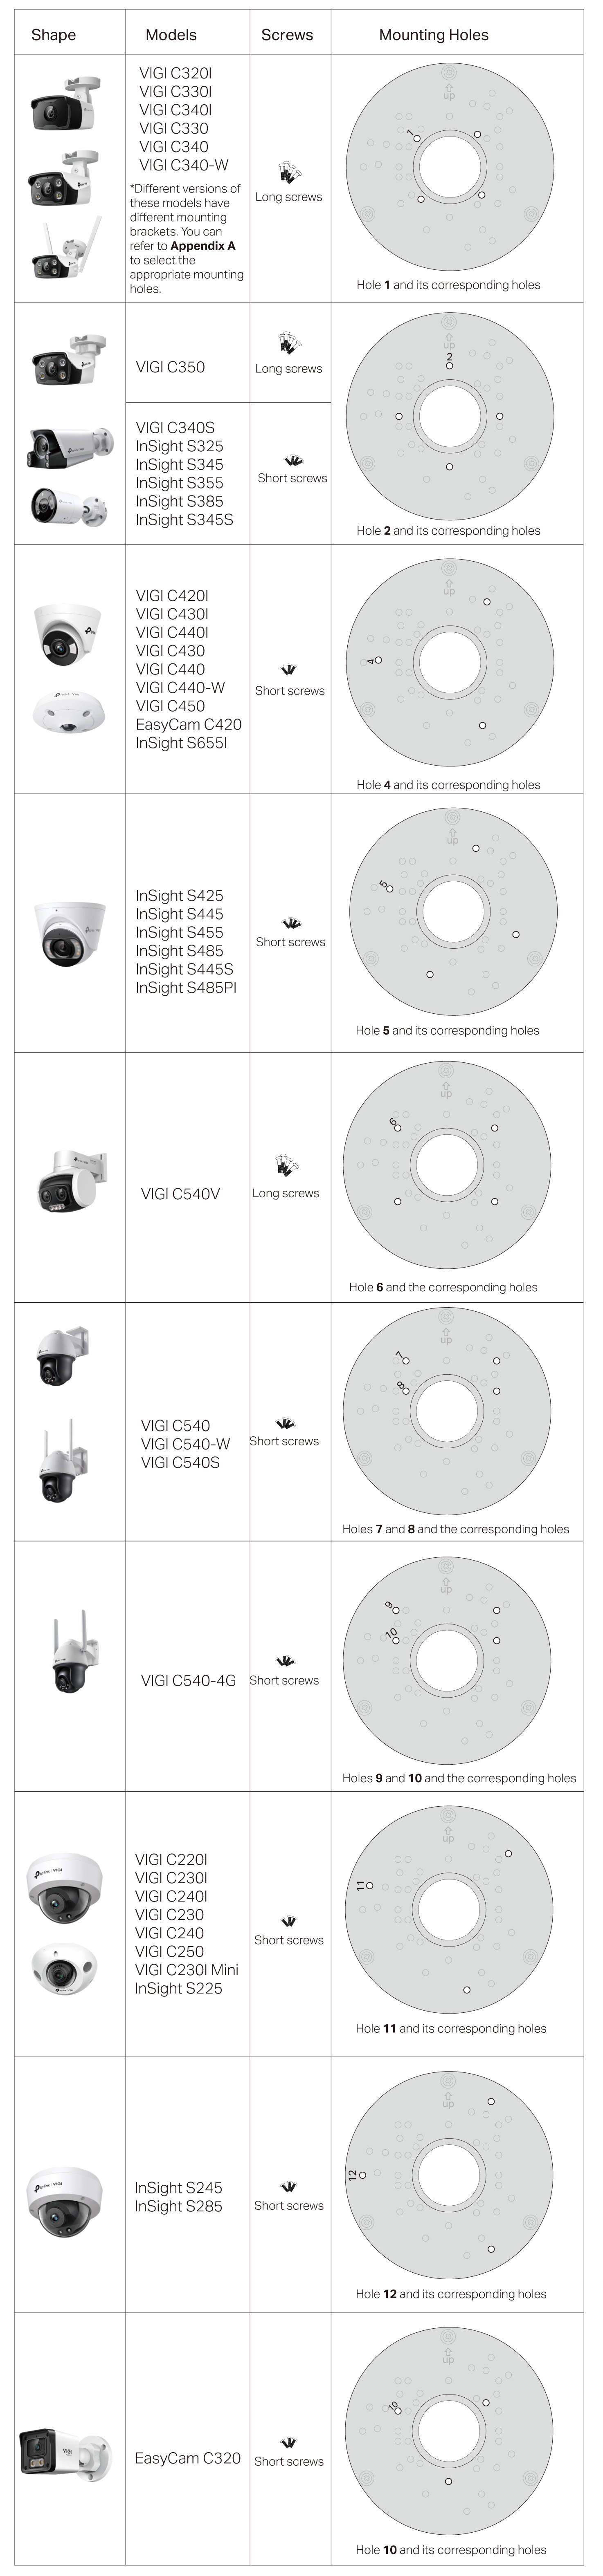
3. Select the appropriate screws and mounting holes on the junction box according to the table below.
4. Use screws to install the camera to the junction box by referring to the installation guide of your camera.
5. Secure the cover plate to the box base.
Usage Tips:
1. When installing the camera, some cameras (such as the VIGI C2XX series, VIGI C4XX series, and VIGI C5XX series) may block the top screws. Before installing the camera, secure the cover plate to the box base.
2. It's recommended to install waterproof cable attachments and route the cables into the junction box before installing the camera.
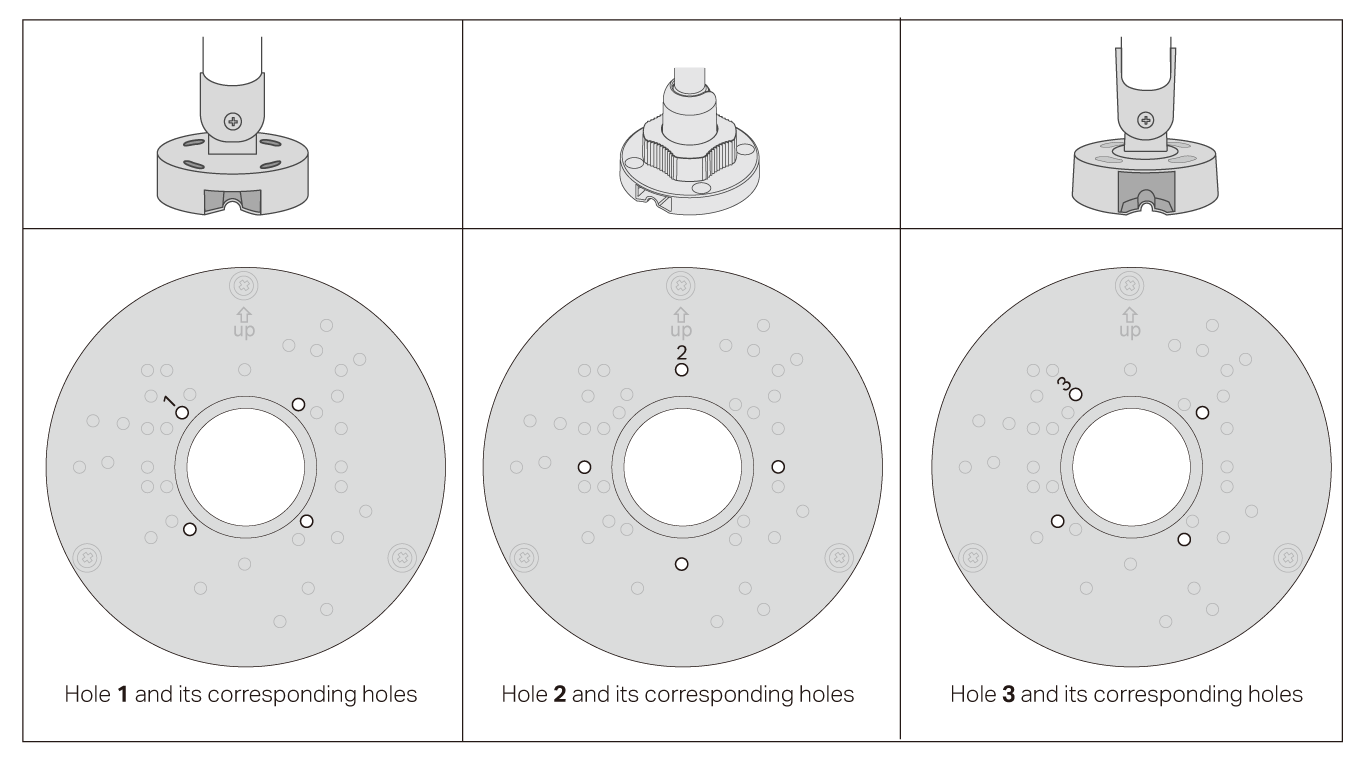
Appendix A: Mounting Holes for Different Brackets
You can choose the appropriate mounting holes according to your camera mounting bracket.