
TP-LinkBox 7 Pro Setup Guide
Welcome! Let’s get your router up and running together.
This guide makes setup simple for everyone, covering helpful accessibility resources, what’s in the box, how it looks, and where to begin.
Our Tether app and web management page also offer accessibility features, such as increasing page contrast, switching to landscape mode and increasing font size. You can enable them during setup to make it much easier to set up your device and adjust settings! For more accessibility guidance, refer to Accessibility Support.
Note: For some models, Accessibility features will be supported by subsequent firmware upgrades.
Now, ready to explore your router and get connected?
Step 1. Learn About Your Router
This section introduces the router's package contents and appearance, including its ports, buttons, and product label.
1. Unpack Your Router
Your package includes: a router, a power adapter, an Ethernet cable, a TAE-RJ11 Adapter, a RJ45-TAE Cable, and installation guides.
Power Adapter: A block-shaped charger with a cord. Plug it into the router’s power port to turn it on.
Ethernet Cable: A thick cable with plastic connectors at both ends. Each connector has a small clip to hold it in place. To use the cable, insert one end to the WAN port on your router until you hear or feel a click and the other end to an Ethernet outlet or a modem. To unplug it, you can press the click and pull it out.
TAE-RJ11 Adapter: A small, square-shaped device typically used for converting power or data signals. The end of the cable features a RJ11 connector for plugging into the router's phone port.
RJ45-TAE Cable: A thick, smooth cord with a slightly stiff feel. The RJ45 connector is a rectangular plastic connector at one end, with a small lever-like clip on top. The TAE connector has multiple pins to connect to various types of devices.
2. Appearance
The device is shaped like a tall, smooth-edged rectangular box with softly rounded corners and a slightly curved front surface. On one edge, it features LED indicators. On the other edge, it features buttons and ports. It also has an oval flat top and bottom with strip ventilation grills to prevent overheating. The side with four oval footpads is its bottom, and the other, its top.
First, with the router’s bottom facing down, place the router on a flat surface.
Next, face directly the edge that has several recessed square opening and protruding buttons. They are arranged in two columns, left and right.
At the very top, there is a large, rectangular block containing four identical square openings, arranged in a 2x2 grid, two on the left and two on the right.
- Two Gigabit LAN Ports : Two square RJ-45 ports on the right. They are used to connect to additional wired devices.
- A 2.5 Gbps LAN Port: The first square RJ-45 port on the left. For connecting to additional wired devices.
- A 2.5 Gbps WAN Port: The second square RJ-45 port on the left. Connects to your modem or Ethernet outlet or additional wired devices.
Directly below there Ethernet ports, you'll find two smaller, square openings and a small, rectangular slot side-by-side. From left to right, they are:
- Two Telephone Ports (1-2): Two square RJ-11 ports, for connecting the analog telephone to the modem router. Note that you can connect a maximum of two ports (one to Phone 1 and the other to Phone 2) for Voice over IP (VoIP) services. These ports allow you to connect a phone device to the router and make calls over the Internet.
- USB 3.0 Port: A vertical, rectangular slot on the right. Connect USB storage devices here.
Below these ports, you'll find two small, round, protruding buttons side-by-side. From left to right, they are:
-
DECT Button: A small round protruding button. Put your cordless DECT phone into registration mode and press the DECT button on the router for 3 seconds until the Phone LED starts flashing.
-
WLAN/WPS Button: A small round protruding button. To connect via WPS, press and immediately release the button, then press the WPS button on your device to connect via WPS. Press and hold the button for about 2 seconds, then release the button to turn the router’s Wi-Fi on or off.
Below these two buttons, you'll find a tiny recessed hole and a recessed square opening side-by-side. From left to right, they are:
-
Reset Button: A tiny recessed hole needs a pin to press. Hold for over 5 seconds to reset the router to its factory settings.
- DSL Port: A square RJ-45 port, for connecting the port to the splitter or directly connect the port to the phone jack via a phone cable.
Immediately the Reset hole and DSL Port, there is a Power On/Off Button and a Power Slot. From left to right, they are:
-
Power Button: A round protruding button. To turn on your router, press it and wait about 2 minutes for the router to boot up. To turn off your router, press and immediately release it.
-
Power Slot: A round port. Plug in the provided power adapter to connect the router to the power socket.
On the bottom of the router, there is a recessed label below the router’s mounting hole. This label includes: the router’s default network name (SSID), the MAC address, and a QR code for scanning to connect to the default Wi-Fi.
Step 2. Set Up Your Router
1. Position your router. Make sure that the router is within reach of an AC power outlet and near Ethernet cables for wired devices. If possible, try moving it closer to a window for better signal.
2. Scan the QR code below to download and install the Tether app. Then follow the app instructions to set up your router.
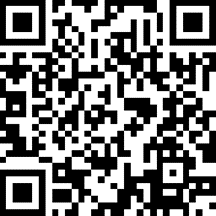
Alternatively, you can click the button below to download and install the Tether app for iOS or Android.
Note: Please remain online (Wi-Fi or mobile data) throughout the app download and login steps.


Tips:
You can also cable and set up your router with a web browser by visiting http://tplinkmodem.net or http://192.168.1.1. For detailed information, please refer to the router’s quick installation guide or user guide.
Support
For technical support, replacement services, user guides, and other information about your product model, please visit https://www.tp-link.com/support/
*TP-Link hereby declares that the device is in compliance with the essential requirements and other relevant provisions of directive 2019/882/EU. The original EU Declaration of Conformity may be found at https://www.tp-link.com/en/support/ce/