How to configure Media Sharing on SR20
1. Connect Your USB Disk Insert your USB storage device into the router’s USB port directly or using a USB cable.
Tips:
• If you use USB hubs, make sure no more than 4 devices are connected to the router.
• If the USB storage device requires using bundled external power, make sure the external power has been connected.
• If you use a USB hard drive, make sure its file system is FAT32, exFat, NTFS or HFS+.
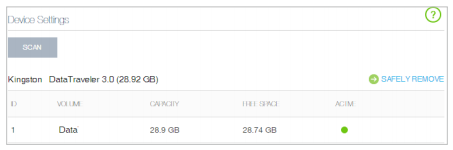
• Before you physically disconnect a USB device from the router, safely remove it to avoid data damage: Go to Advanced > USB Settings > Device Settings and click  .
.![]() .
.
2. Customize USB settings
By default, Share All is enabled, so all content on the USB disk is shared. If you want to only share specific folders, follow the steps below:
1). Visit http://tplinkwifi.net, then log in with your Kasa account.
Note: Web management interface cannot be accessed if the router is not installed successfully via Kasa App.
2). Select Basic > USB Settings. Focus on the Folder Sharing section. Click the button to disable Share All, then click Add to add a new sharing folder.
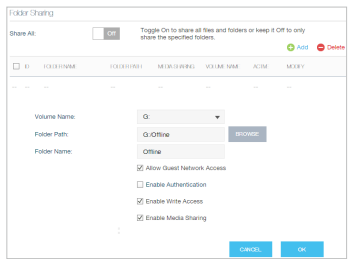
3). Select the Volume Name and Folder Path, then enter a Folder Name as you like.
4). Tick Enable Media Sharing and click OK.
Tips: The router can share 32 volumes at most. You can click  on the page to detach the corresponding volume you do not need to share.
3. Access the Media Files on Your USB Disk
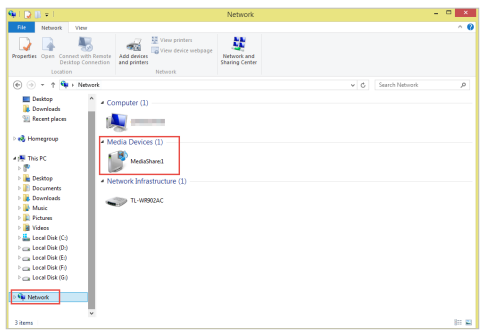
Now the DLNA-supported devices (such as your computer and pad) connected to the router can detect and play the media files on the USB disk.
Go to Computer > Network, and click the Media Server Name in the Media Devices section.
Note: Here we take Windows 8 as an example.
Get to know more details of each function and configuration please go to Download Center to download the manual of your product.
Is this faq useful?
Your feedback helps improve this site.
TP-Link Community
Still need help? Search for answers, ask questions, and get help from TP-Link experts and other users around the world.