How to set up Port Forwarding feature on the Deco

When You Set Up
Updated 06-26-2023 11:03:20 AM FAQ view icon618779
This Article Applies to: 

Port Forwarding allows you to make a device or service on your local network accessible by other devices over the internet, whilst ensuring your network remains protected.

Different services use different service ports, such as Port 80 for HTTP service, port 21 for FTP service, port 25 for SMTP service, and port 110 for POP3 service. Please verify the service port number before the configuration.

Note: Currently, some Deco models only support 16 port forwarding entries. But don’t worry since they will support up to 64 entries in the future via firmware updates.

Here we take Deco M5 as an example.

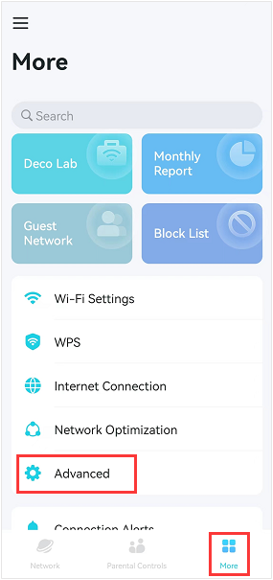
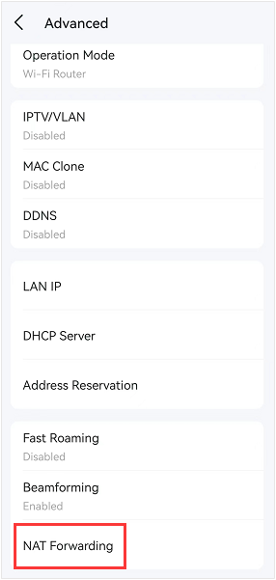
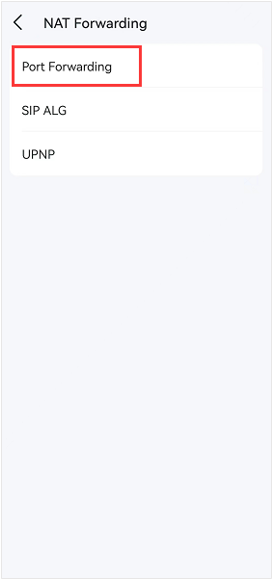
1. Launch the Deco app, tap More-> Advanced->NAT Forwarding->Port Forwarding.

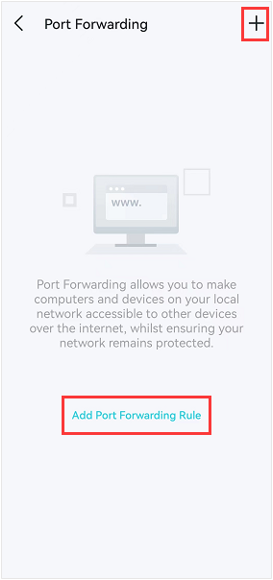
2. Tap + icon at the upper right corner or click on Add Port Forwarding Rule to add a rule.

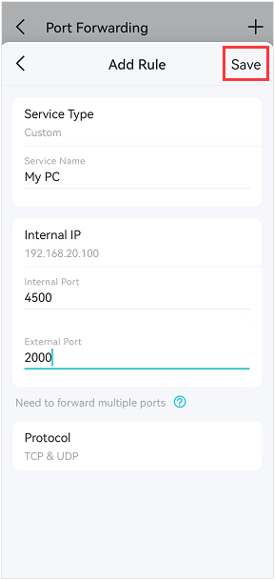
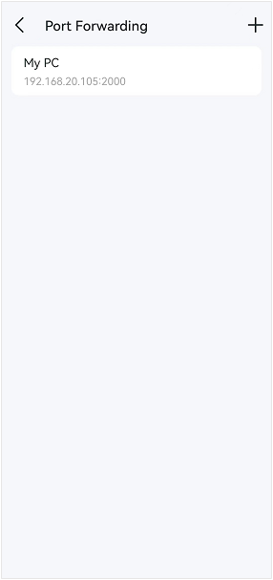
3. Choose a Service Type, type in the Service Name, and tap Internal IP to select a device you want to open ports for, then type in the External Port and Internal Port (Service Port), then click on Save to add a port forwarding rule.

If you leave the Internal Port blank, the internal ports will be the same as the external ones. For example, set up the External Port as 4500 and leave the Internal Port blank, then tap Save, and the internal port 4500 is opened.

Note: Deco does not support the feature of entering the Internal IP address manually. In a normal case, if a device connects to Deco and gets an IP address, Deco will show the device when configuring the port forwarding feature.

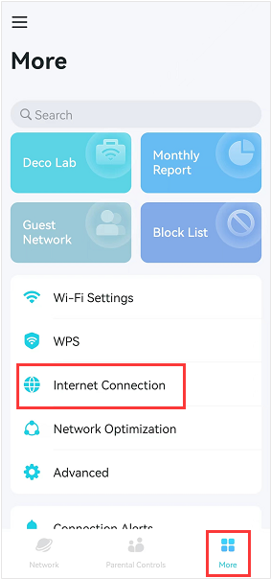
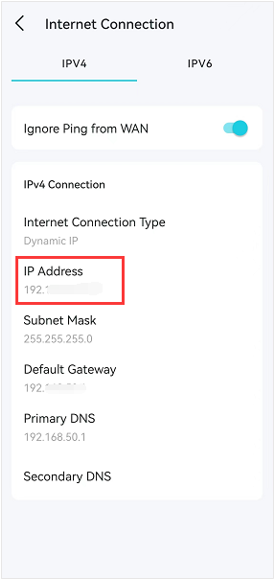
4. Go to the More>Internet Connection>IPv4 page to check the WAN IP address of the Deco system. Now you can try to use WAN IP:Port Number (External Port) to access the service from the outside network.

Note:

If the WAN IP address of the Deco is not a public IP address but a private IP address, that means there is another NAT device connected to the WAN Port of the main Deco, and you need to open the service ports on that device as well.

For how to verify whether the IP Address is a public one or a private one, please refer to this link:

http://en.wikipedia.org/wiki/Private_network

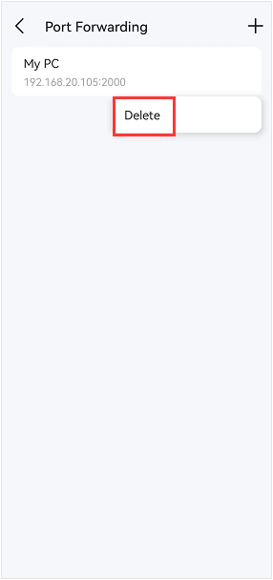
5. If you want to delete the port forwarding entries, please go to the More->Advanced->NAT Forwarding>Port Forwarding page, hold the entry you want to delete, then click on Delete to delete the entry.

Related FAQs

Is this faq useful?

Your feedback helps improve this site.

Recommend Products

Community

TP-Link Community

Still need help? Search for answers, ask questions, and get help from TP-Link experts and other users around the world.

Visit the Community >

icon

Accessibility Adjustments

icon RESET

Choose the right accessibility profile for you

OFF

Seizure Safe

Eliminates flashes and reduces color

OFF

Cognitive Disability

Assists with reading and focusing

OFF

Vision Impaired

Enhances the website's visuals

OFF

ADHD Friendly

More focus and fewer distractions

Content Adjustments

Adjust Scale

icon
100%
icon

Highlight Title

icon

Highlight Link

icon

Text Magnifier

icon

Readable Font

icon

Align Center

icon

Align Left

icon

Align Right

icon

Color Adjustment

Low Saturate

icon

High Saturate

icon

Dark Contrast

icon

Light Contrast

icon

Set Text Colors

Monochrome

icon

Set Title Colors

High Contrast

icon

Set BackgroundColor

Orientation Adjustments

Muted

icon

Hide Images

icon

Stop Animation

icon

Reading Mask

icon

Highlight Hover

icon

Big Black Cursor

mutedicon

Big White Cursor

icon

Hide Video/Audio

icon

Stop Video

icon

Stop Audio

icon

Hide Animation

icon

Reading Guide

icon

Useful Links

Chat Now