How to install Network Adapter by loading the driver file manually
Step 1 Plug the adapter into the PCI slot of the computer and then start your computer.
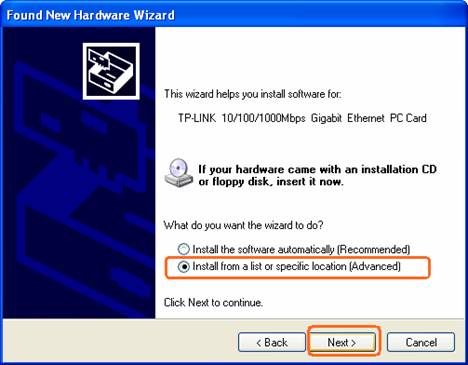
Step 2 The computer will detect the adapter and the Found New Hardware Wizard will appear, Select Install from a list or specific location (Advanced) and then click on Next button.
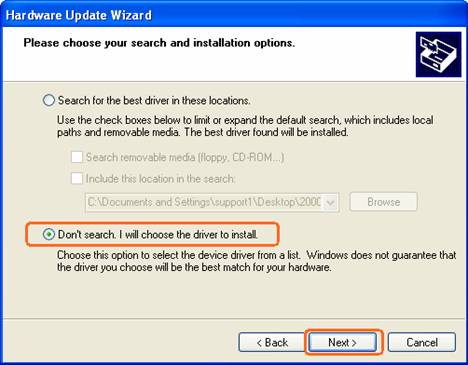
Step 3 Select Don´t search. I will choose the driver to install and then click on Next button.
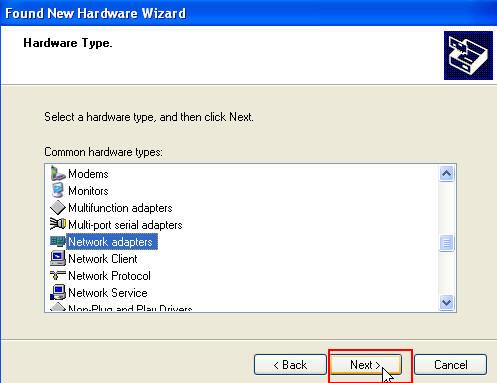
Setup 4 Choose “network adapters” and click Next.
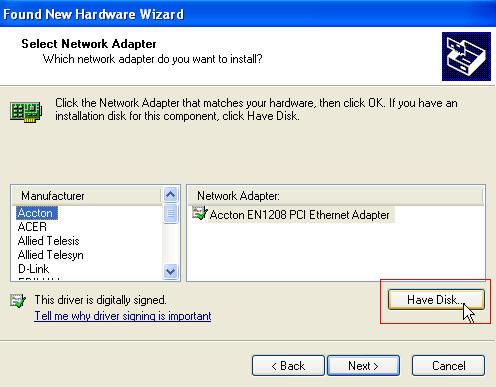
Step 5 Click on Have Disk…
Note: Please do not select any network adapter which is listed in the window.
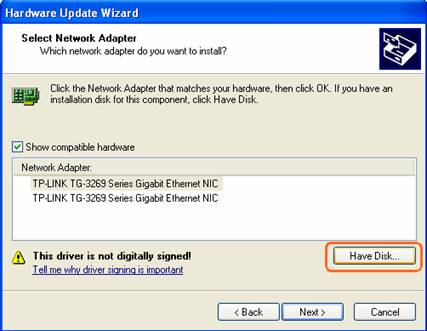
Maybe the below window appears on your screen instead of the above one, Please do not select any network adapter which is listed in the window, please click “Have Disk”.
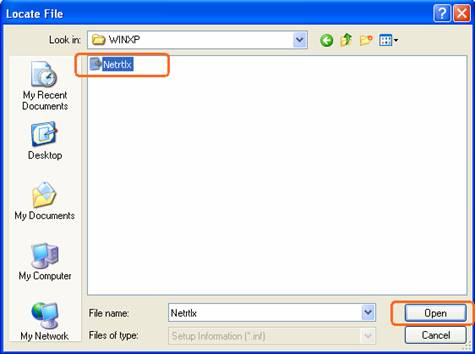
Step 6 Then Locate File window will appear, please locate and select the correct driver file which is for your Operating System and then click Open button.
For example, the driver for Windows XP is in the sub file folder WINXP which contained in the driver folder for the model of the adapter.
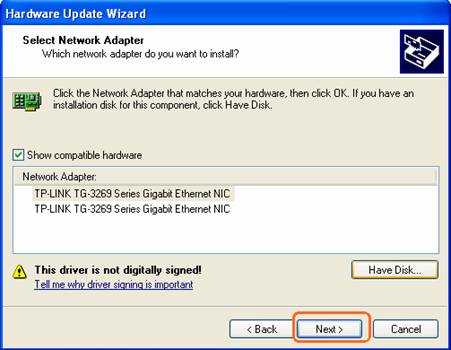
Step 7 Click on Next button and then wait the driver installed completed
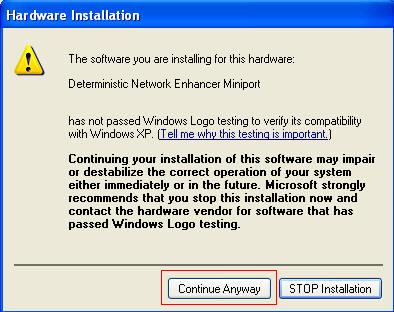
Setup 8 Maybe the below window will appear during the installing, please click “Continue Anyway” to complete your installation.
Is this faq useful?
Your feedback helps improve this site.
TP-Link Community
Still need help? Search for answers, ask questions, and get help from TP-Link experts and other users around the world.
4.0_normal_1587868757437c.png)