How to recover the router when it bricked
Archer C1200 , Archer C5400 , Archer A2600 , Archer AX55 , Archer C4 , Archer C5200 , Archer AX53 , Archer C5 , Archer AX10 , Archer C2 , Archer AX51 , Touch P5( V2 ) , Archer AX96 , Archer A2200 , TL-WR1043N( V5 ) , Archer C80 , Archer AXE95 , Archer C8 , Archer AX10000 , Archer C3150 , Archer C9 , Archer AX50 , Archer C6 , Archer C7 , Archer AX90 , Archer AX6000 , Archer C5400X , Archer C25 , Archer C24 , Archer A20 , Archer A64 , Archer C60 , Archer C2600 , Archer A1200 , Archer C21 , Archer C20 , Archer C64 , Archer AX1800 , Archer AX206 , Archer C59 , Archer C58 , Archer AX4200 , Archer C3200 , Archer C900 , Archer A2 , Archer AX75 , Archer AX4400 , Archer C3000 , Archer AX73 , Archer C50
Recent updates may have expanded access to feature(s) discussed in this FAQ. Visit your product's support page, select the correct hardware version for your device, and check either the Datasheet or the firmware section for the latest improvements added to your product. Please note that product availability varies by region, and certain models may not be available in your region.
Introduction: On rare occasions, a router may become unresponsive during an upgrade process. The most common reason leading to this is the router losing power during the upgrading process. When becomes a brick, the router’s Power and WPS LEDs are solid on. We provide 2 methods for you to attempt to restore your router. The Method 1 applies to most of the TP-Link routers, the Methods 2 applies to the AX series routers.
**Note: Most of the TP-Link Router supports firmware recovery, but some old models don't support, if it failed, it might not support, please contact Support.
Method 1. Recover TP-Link Router when it bricked.
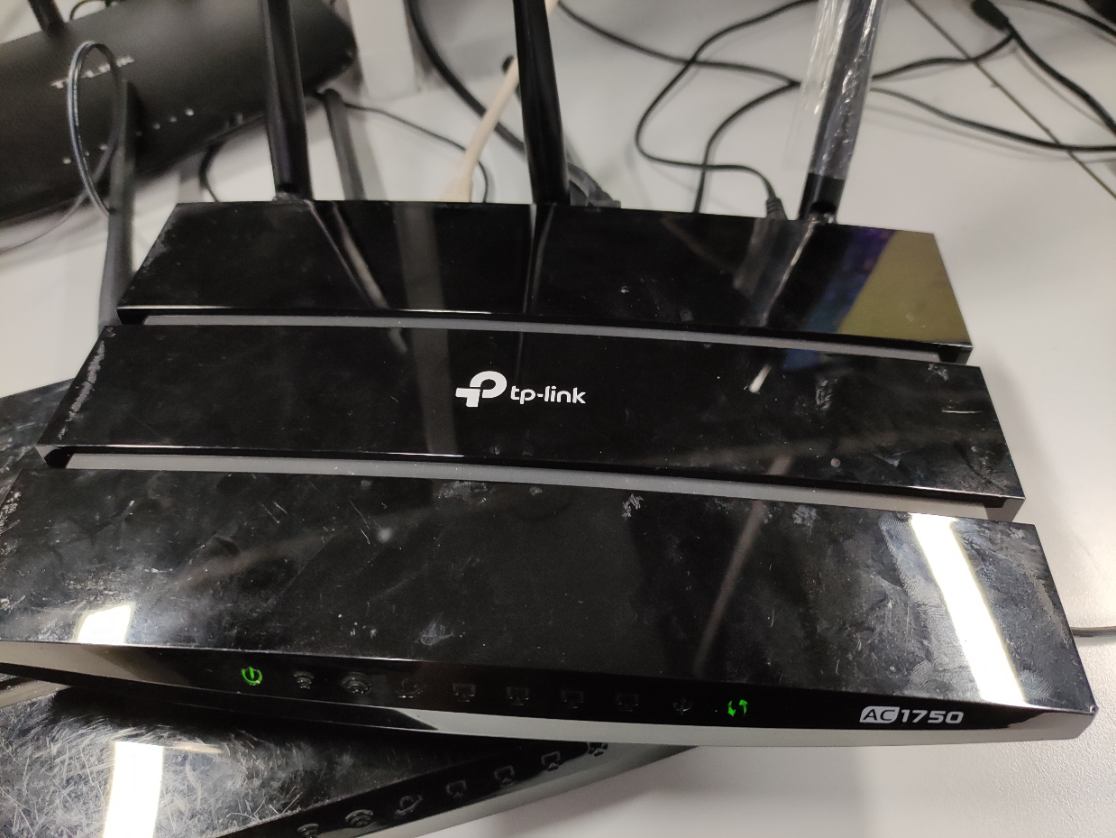
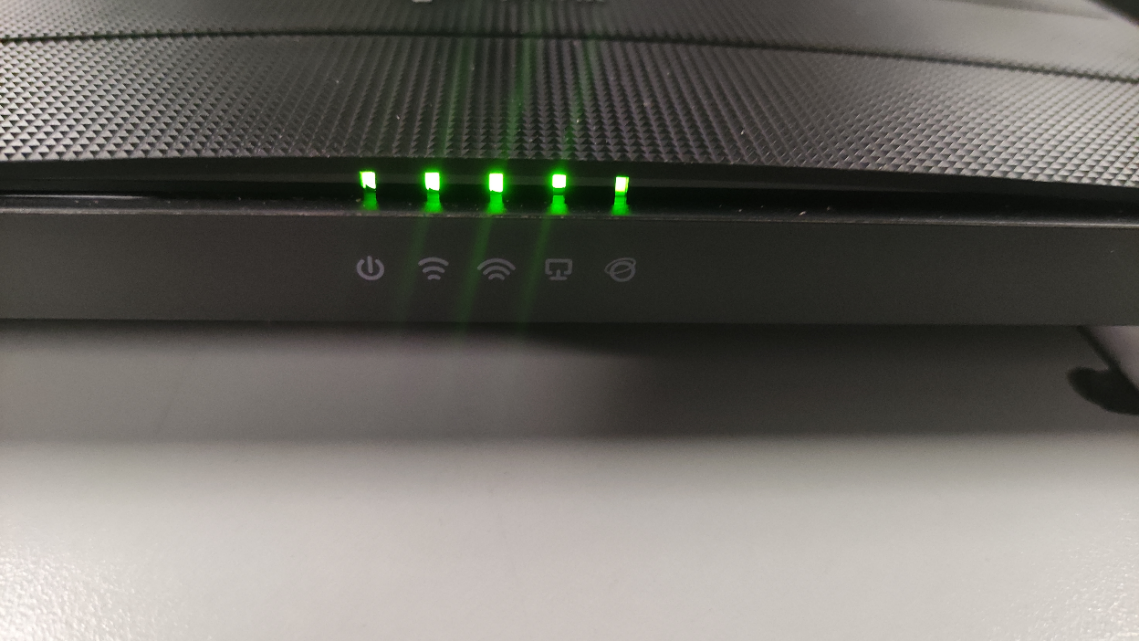
Typical light status if your router becomes brick
1. Both the power light and the WPS light turn on when you power on the router, and the PC wired to the router can detect the connection. (e.g. A7 V5)
2. The power light blinking rapidly, while other lights still turn on normally. (e.g. C80 v1)
Step 1:
Download the latest firmware version for your device from our official website, tp-link.com( please go to Download Center ). This file will be compressed so unzip tools such as WinZip or WinRAR will be needed to extract the firmware file to a folder.
Step 2:
Connect the PC to one of the router’s LAN (yellow) ports. Ensure there are power and link showing on the router.
Step 3:
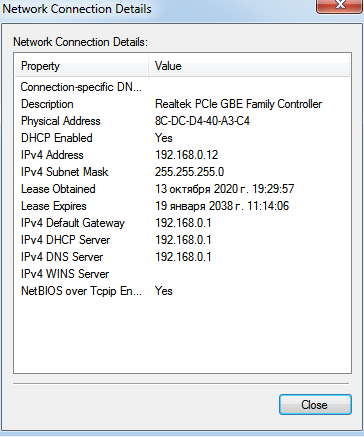
Check the IP address on your PC. Refer here
Case 1: If the IP address is 192.168.0.XX. Then you can go to step 4 directly.
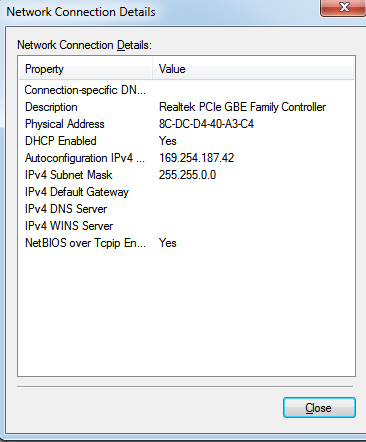
Case2: If it is self-assigned IP and not the IP that in the router’s network, you will need to assign an IP address for your PC.
Setup a static IP like the example below.
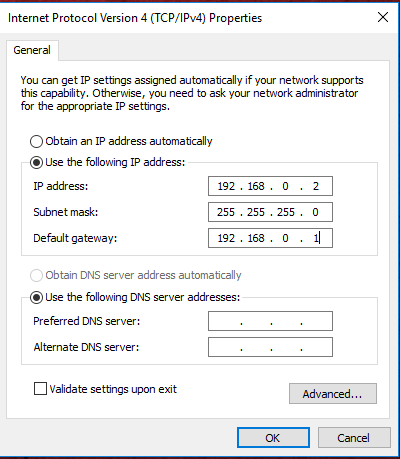
Step 4:
Open your web browser (Chrome, IE etc.), in the address bar browse to: 192.168.0.1.
Power cycle the router with the power button, wait a moment and you will get this page.


For Archer C80, the page will prompt you what to do.
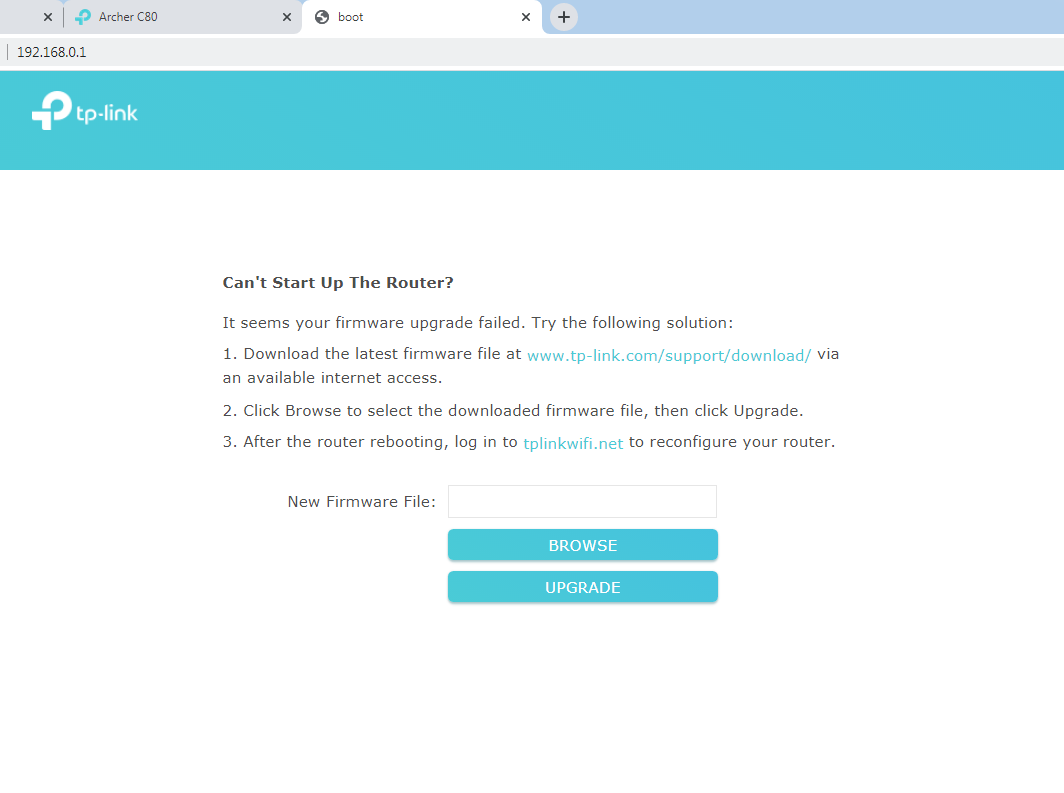
Step 5:
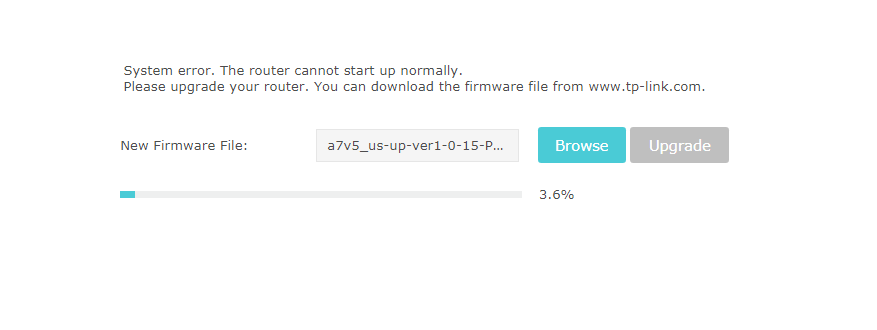
Click Browse, select the firmware file you stored on the PC before, then click Upgrade.

Step 6:
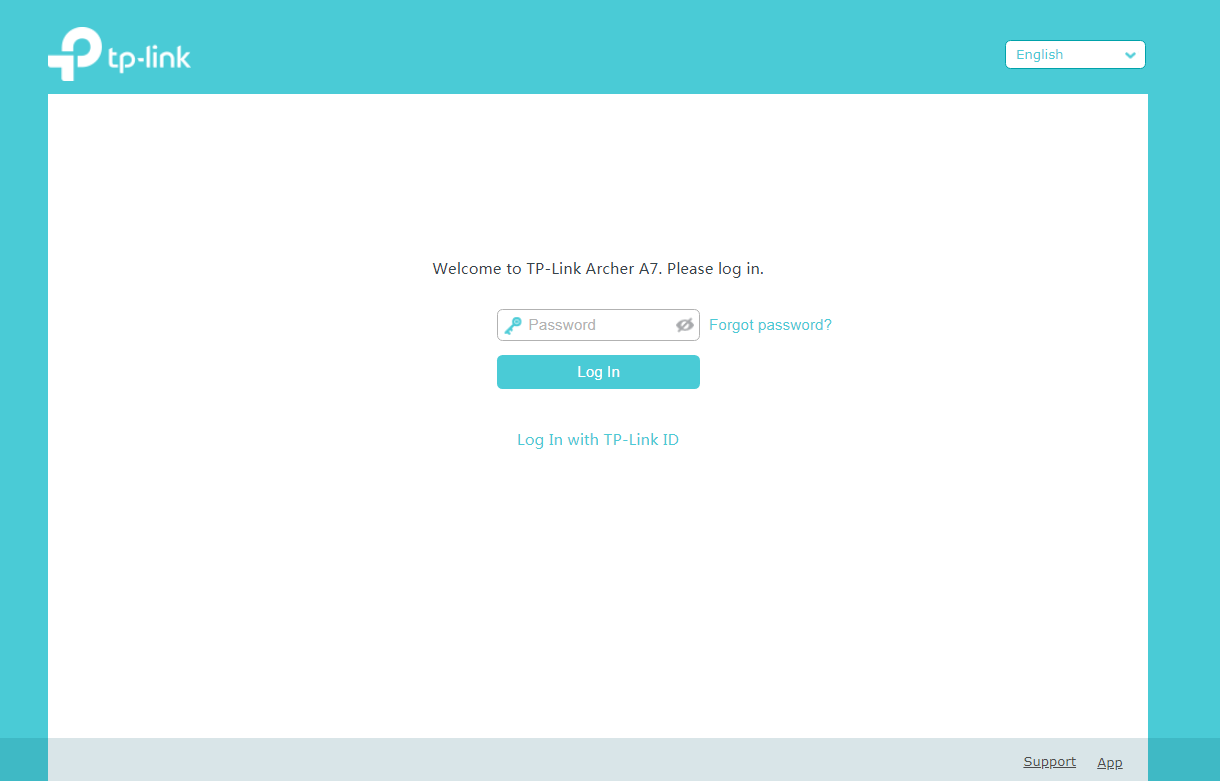
After finish upgrading, the router will come to work normally again.
Method 2. Rescue the TP-Link Archer AX Router when it bricked.
How do I know if my router turns a brick or not?
If your router has powered on but only an LED lights orange in the middle, then it may turn a brick.

Rescue Steps
- Download router’s latest firmware from the official TP-Link website here: Download Center | TP-Link
You can find the router’s model on the label at the bottom of the router.
After downloading the firmware’s zip file from the website, please extract the zip file first, then you can see the bin file which is the firmware file.
Important Notice: Please download firmware/software from the local TP-Link official website of the purchase location for your TP-Link device, otherwise it may cause upgrade failure or mistakes and be against the warranty.
- Power off the router first, then hold the WPS button (Some models may use Reset button) on the back of the router and power on the router for 5 seconds until there’s only a LED lights orange in the middle.

- Connect your PC to the LAN port of the router by Ethernet Cable.
- Change your PC’s IP address to 192.168.0.10, Subnet mask as 255.255.255.0:
For Windows:
1) Go to “Control Panel - Network and Internet - Network and Sharing Center”, then click “Change adapter settings”.

2) Then right-click the Ethernet Adapter and choose “Properties”, then double click “Internet Protocol Version 4 (TCP/IPv4)”.

3) On the pop-up window, click “Use the following IP address” then fill in the table as the screenshot below, then click “OK” on this window, and click “OK” again on the Ethernet Properties to save the settings
For macOS:
Please go to “System Preferences - Network”, find LAN connection, then choose Configure IPv4 as “Manually”, setup IP address as “192.168.0.10”, subnet mask as “255.255.255.0”, then click “Apply”.

- Then open the Internet Browser and access “192.168.0.1” in the address bar, then you can see a website like this.

- Choose the bin firmware file that you download from the website first then press update, the router will automatically recover to the latest firmware and reboot, this procedure may take several minutes.

Important Notice: Please don’t power off the router during the upgrading procedure otherwise it may cause upgrade failure or hardware faulty and be against the warranty.
- When all the LED on the router become stable, the router would finish recovering. Please go back to the system’s IP settings and change all the settings back. Then you can continue first-setup on your router.

Is this faq useful?
Your feedback helps improve this site.
What’s your concern with this article?
- Dissatisfied with product
- Too Complicated
- Confusing Title
- Does not apply to me
- Too Vague
- Other
Thank you
We appreciate your feedback.
Click here to contact TP-Link technical support.
TP-Link Community
Still need help? Search for answers, ask questions, and get help from TP-Link experts and other users around the world.
This website uses cookies to improve website navigation, analyze online activities and have the best possible user experience on our website. You can object to the use of cookies at any time. You can find more information in our privacy policy . Don’t show again
This website uses cookies to improve website navigation, analyze online activities and have the best possible user experience on our website. You can object to the use of cookies at any time. You can find more information in our privacy policy . Don’t show again
Basic Cookies
These cookies are necessary for the website to function and cannot be deactivated in your systems.
TP-Link
accepted_local_switcher, tp_privacy_base, tp_privacy_marketing, tp_smb-select-product_scence, tp_smb-select-product_scenceSimple, tp_smb-select-product_userChoice, tp_smb-select-product_userChoiceSimple, tp_smb-select-product_userInfo, tp_smb-select-product_userInfoSimple, tp_top-banner, tp_popup-bottom, tp_popup-center, tp_popup-right-middle, tp_popup-right-bottom, tp_productCategoryType
Livechat
__livechat, __lc2_cid, __lc2_cst, __lc_cid, __lc_cst, CASID
Youtube
id, VISITOR_INFO1_LIVE, LOGIN_INFO, SIDCC, SAPISID, APISID, SSID, SID, YSC, __Secure-1PSID, __Secure-1PAPISID, __Secure-1PSIDCC, __Secure-3PSID, __Secure-3PAPISID, __Secure-3PSIDCC, 1P_JAR, AEC, NID, OTZ
Analysis and Marketing Cookies
Analysis cookies enable us to analyze your activities on our website in order to improve and adapt the functionality of our website.
The marketing cookies can be set through our website by our advertising partners in order to create a profile of your interests and to show you relevant advertisements on other websites.
Google Analytics & Google Tag Manager
_gid, _ga_<container-id>, _ga, _gat_gtag_<container-id>
Google Ads & DoubleClick
test_cookie, _gcl_au
Meta Pixel
_fbp
Crazy Egg
cebsp_, _ce.s, _ce.clock_data, _ce.clock_event, cebs
lidc, AnalyticsSyncHistory, UserMatchHistory, bcookie, li_sugr, ln_or


