How to remove the panel of smart switch and smart in-wall outlet
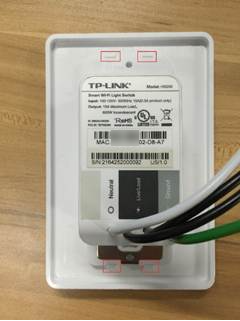
There are four fit points that set up the connection between faceplate and main body of switch on the back of HS200.
Remove with bare hands
Before HS200 is mounted in the wall, you need to remove the panel to install the main body conveniently. Please hold the main body of switch, and break off in the direction of one fit point so that all points could be detached in order.
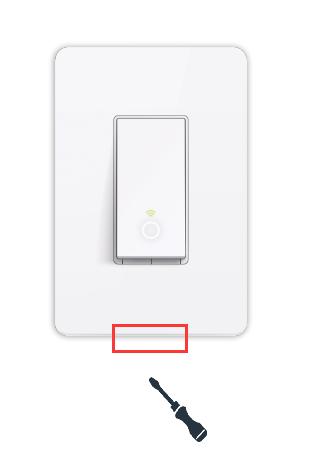
Remove with tools
For one special case, if you mount the device in the wall completely and find that you have wrong wire connection, you need to remove the panel firstly and reconnect wires.
We recommend to use flat hard tool to assist. For instance, we could use straight screwdriver to insert a small crack at one corner of faceplate and fit point is supposed to be detached. Follow the steps for four corners of faceplate and the faceplate could be took down.
Is this faq useful?
Your feedback helps improve this site.


TP-Link Community
Still need help? Search for answers, ask questions, and get help from TP-Link experts and other users around the world.