How to configure Address Reservation on the TP-Link Wi-Fi Routers (new designed blue UI)
When you specify a reserved IP address for a PC in the LAN, the PC will always receive the same IP address each time when it connects to the DHCP server. If there are some PCs in the LAN that require static IP addresses, please configure Address Reservation on the router for the purpose.
Follow the steps below.
Step 1
Access the web interface of Archer C9. Please refer to How to log in to the web-based interface of the Wi-Fi router (new designed blue UI) to access the web interface
Step 2
Then we can go to Advanced -> Network -> DHCP Server-> Address Reservation to do the settings. We would show you the difference between 3 situations.
Situation One
Suitable for Archer C3200, Archer C50 V2.
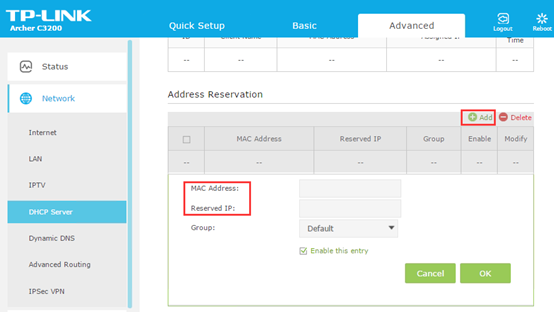
1. Click the Add button.
2. Enter the MAC address of the device for which you want to reserve IP address.
You can enter the MAC address as uppercase or lowercase, and use the colon symbol between them, but the dash symbol is invalid.
For example , you can enter the MAC address as AA:BB:CC:DD:EE:FF or aa:bb:cc:dd:ee:ff . But AA-BB-CC-DD-EE-FF or aa-bb-cc-dd-ee-ff would be invalid.
3. Specify the IP address which will be reserved by the router.
The IP address must be on the same subnet with the LAN IP, and it cannot be a reserved IP address.
For example, the default LAN IP address is 192.168.0.1, so you can reserve the IP address from 192.168.0.2 to 192.168.0.254.
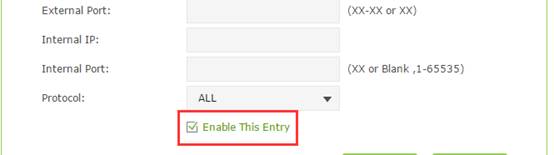
4. Check Enable This Entry and click OK to make the settings effective.
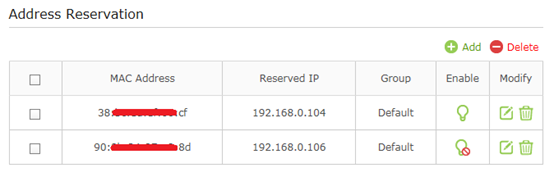
The IP address reservation is configured successfully, and you can see the rule shown as below. If you forget to check Enable This Entry, then we can see a red circle below enable. Please click on the red circle then you can enable it.
5. Finally, please click on the Reboot button on the right top corner, then all the settings would take effect.

Situation Two
Suitable for Archer C3150, Archer C9
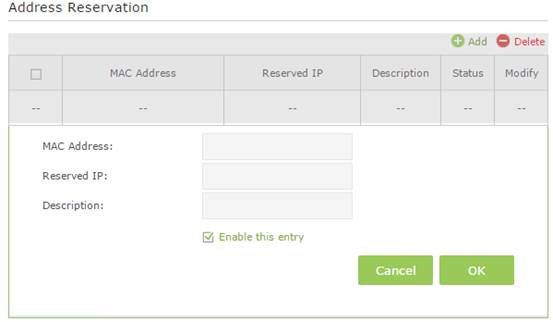
There is something different from the situation one, we could enter description for the rule. It’s recommended for you to enter numbers and characters, but space or special symbol would be invalid.
Situation Three
Suitable for AD7200, Archer C5400, Archer C2600, Touch P5
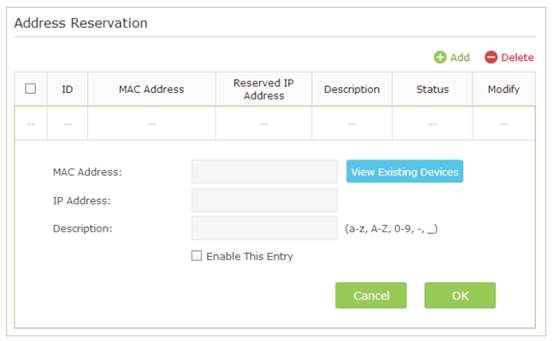
Here we add a new function , click View Existing Devices button , choose the clients , then the MAC address and IP address would be filled automatically.
Get to know more details of each function and configuration please go to Download Center to download the manual of your product.
Is this faq useful?
Your feedback helps improve this site.
TP-Link Community
Still need help? Search for answers, ask questions, and get help from TP-Link experts and other users around the world.