
How to Connect Tapo Robot Vacuum to Home Wi-Fi
Introduction
This article provides step-by-step instructions to connect the Tapo Robot Vacuum to the home Wi-Fi.
Requirement
- Phone/tablet is connected to your home Wi-Fi network.
Note: Only 2.4 GHz Wi-Fi is supported.
- Bluetooth is enabled
- Pre[are Wi-Fi password for setup
Configuration
Step 1. Open the Tapo app and tap Vacuums on the menu bar. Tap the + icon and select your model.


Step 2. Turn on your robot vacuum.
- For RV50/RV30 Max/RV20 Max Series
Press and hold the power button  for 3 seconds to turn it on. You will hear either "Turning On" or a beep, indicating a successful power-on. Tap Next.

- For RV10/20/30 Series:
Slide the power switch from OFF to ON to power your robot vacuum. You will hear either "Turning On" or a beep, indicating a successful power-on. Tap Next.

Step 3. Press and hold the  and
and  buttons simultaneously for 5 seconds and then release. All buttons should start to blink white. Tap Next.
Note: If buttons are not blinking white, press and hold the  and
and  buttons simultaneously for 10 seconds to reset your robot vacuum.

Step 4. Open the Tapo app, click the + button and select Add Device. Then follow the in-app instructions.
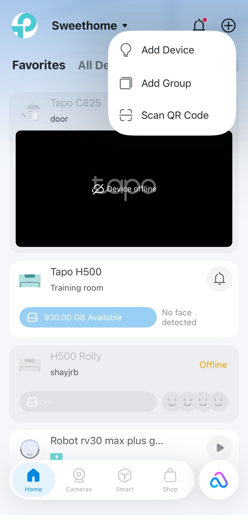
Step 5. Select your home Wi-Fi and enter the Wi-Fi password.
Note: Only 2.4 GHz Wi-Fi is supported.

Step 6. Success! Your robot vacuum is now connected to your Wi-Fi.

Looking For More
Is this faq useful?
Your feedback helps improve this site.



TP-Link Community
Still need help? Search for answers, ask questions, and get help from TP-Link experts and other users around the world.