
How to set up the TP-Link Mobile Wi-Fi on the Tether app
Introduction
This article applies to Mobile Wi-Fi Router models that support management via the Tether app.
- 5G Models: All 5G Mobile Wi-Fi Routers are compatible with the Tether app.
- 4G/3G Models: Only the M7000 4.0 supports the Tether app. Other models (such as the M7450, M7650, and M7750) must use the tpMiFi app instead.
Future firmware updates may expand Tether app compatibility for additional models. For the latest information, check the TP-Link official website.
Requirements
- Download and install the Tether app from the App Store or Google Play.

- Log in to the Tether app with your TP-Link ID.
Configuration
We use the 5G model M8550 as an example.
Step 1. Open the back cover, locate the Nano-SIM card slot, and slide the cover upward to open it. Place your SIM card into the slot with the gold contacts facing down.
Step 2. Before installing the battery, please locate the product label on the inside of the back cover. Scan the barcodes to obtain the Wireless Network Name (SSID) and Password. We strongly recommend taking a clear photo or writing down these details for your initial Wi-Fi setup.
Proceed with assembly: Align the battery’s metal contacts with the connectors in the battery compartment, then gently insert the battery. Place the back cover back onto the device and slide it into position until it clicks securely.
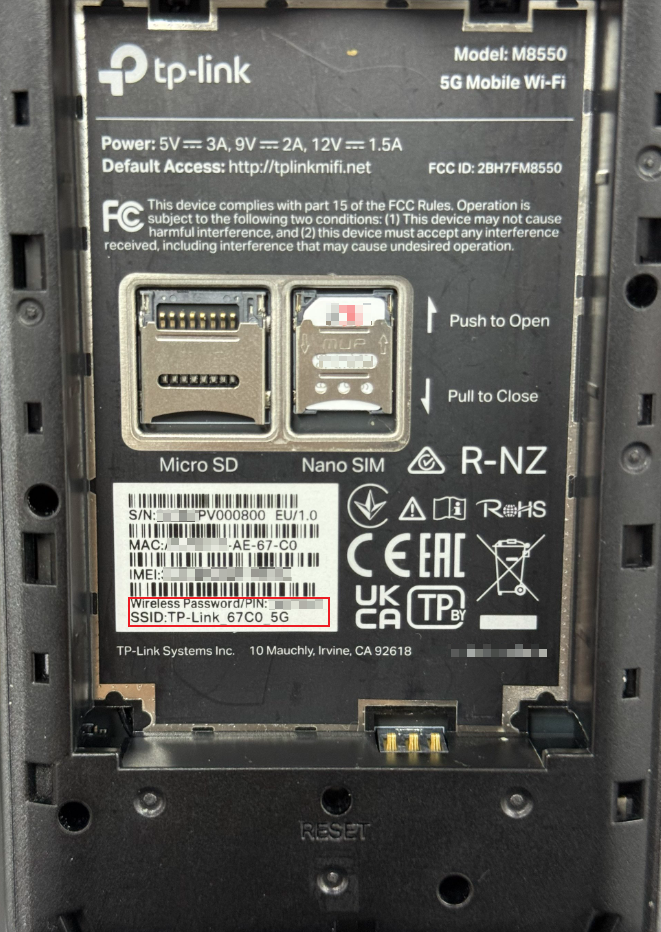
Step 3. Press and hold the Power button (located on the right side) for more than 5 seconds to power on the device. For first-time use, we recommend fully charging the device before turning it on.
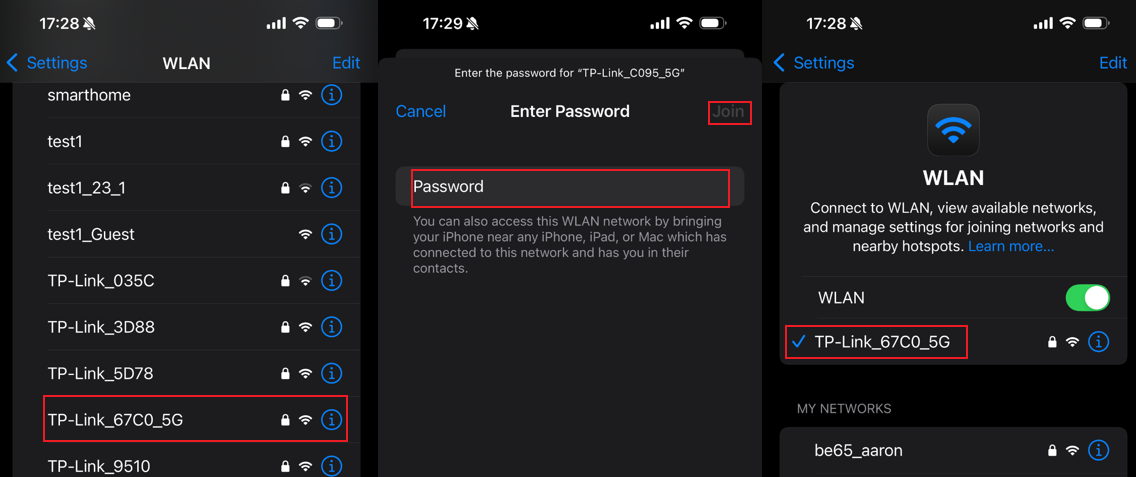
Go to your phone’s Settings and find the WLAN to enable it, find and connect to the Wi-Fi network named TP-Link_XXXX or TP-Link_XXXX_5G.
You can also find the Wi-Fi name and password on the device screen under Settings > Wi-Fi.
Note: “XXXX” represents the last 4 digits of the MAC address you noted on the label.
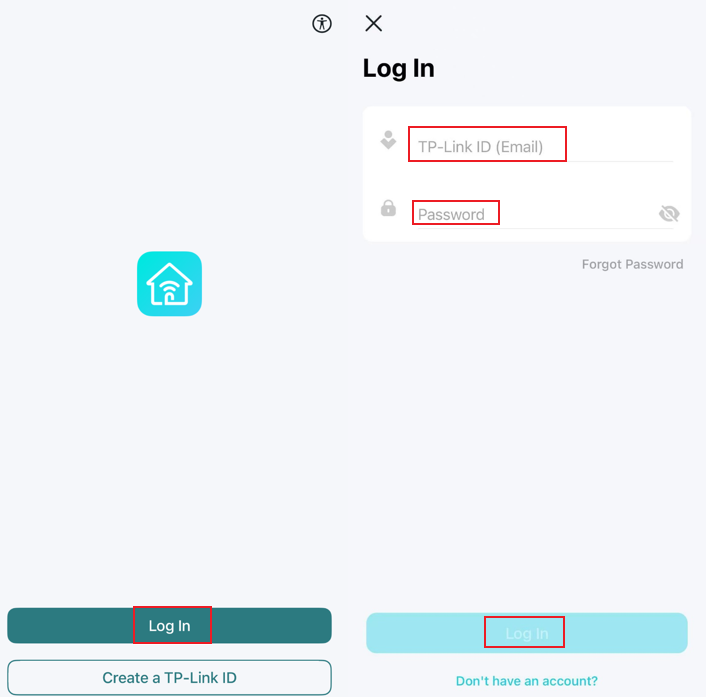
Step 4. Launch the Tether app on your phone and log in to the Tether app with your TP-Link ID.
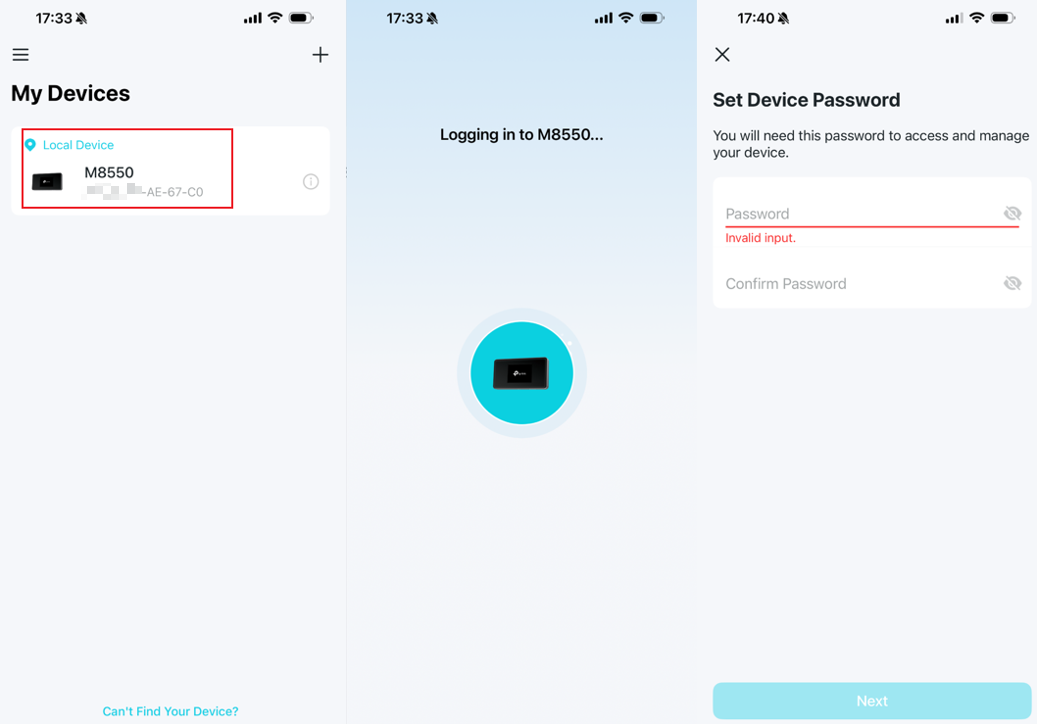
Step 5. Tap your TP-Link Mobile Wi-Fi from the My Devices list, and create a device password for it.
Step 6. Wait for 1 minute, then select your Profile Name. Usually, the Mobile Wi-Fi will automatically detect your ISP if there is a default profile for it.
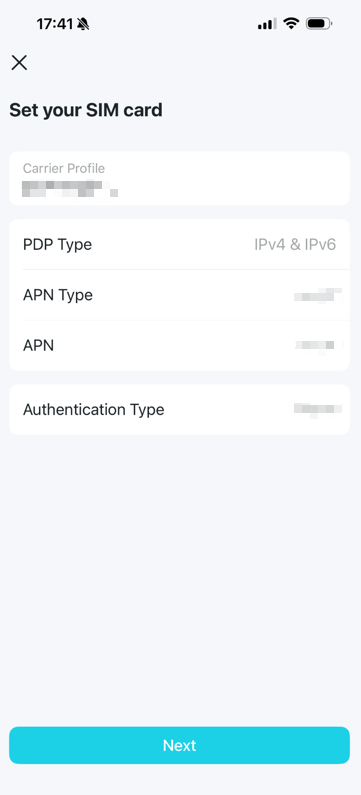
Note: Most Carrier Profiles are pre-configured in the Mobile Router and will be detected by the device itself. If you want to change the Carrier Profile settings, please continue finish the setup process, and go to More > Internet Connection > Internet settings > Cellular > Tap on Service Provider Profile > Scroll down to the button to Create New Profile > Create a Profile Name and go to NEXT > Enter the Profile setting which given by your SIM card carrier and Save it.
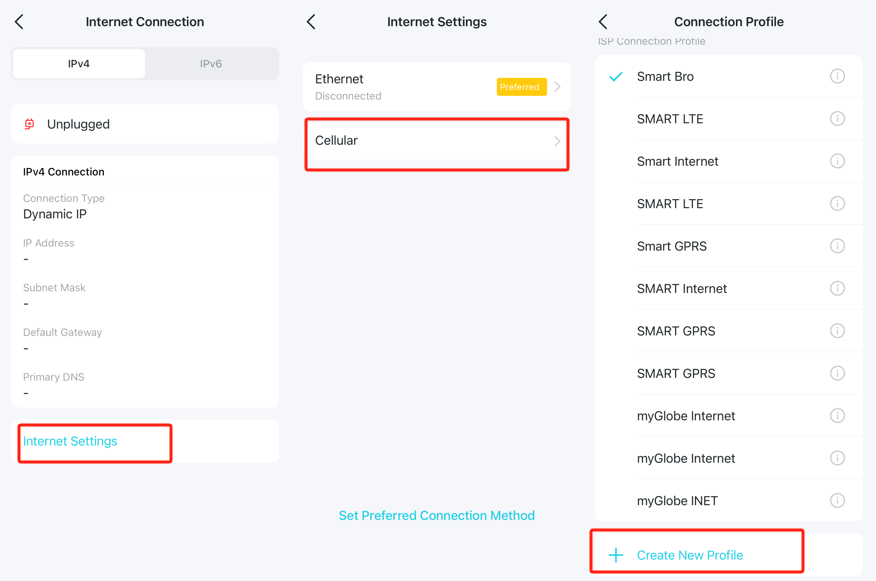
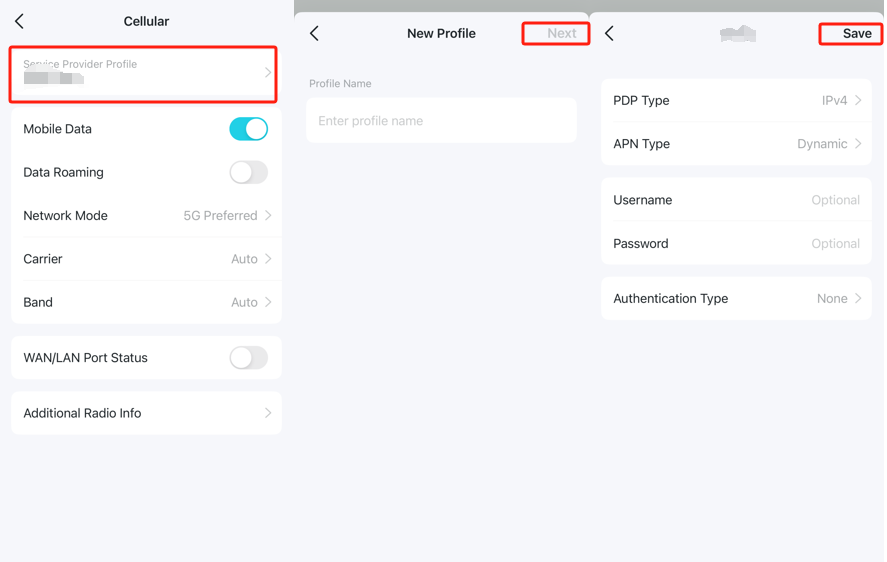
Step 7. Customize the wireless networks on TP-Link Mobile Wi-Fi.
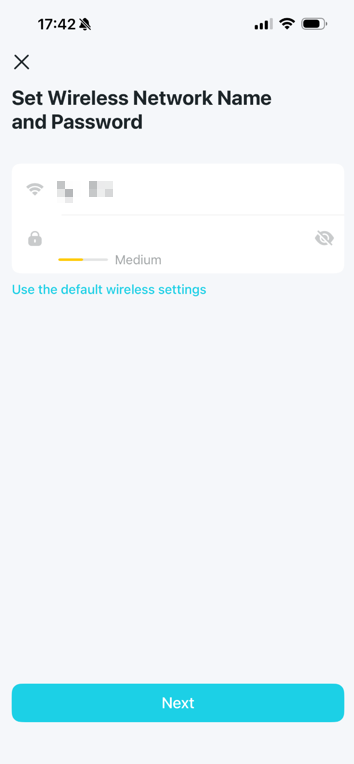
Step 8. Confirm and apply your settings. Your customized Wi-Fi network will be ready to connect within 1-2 minutes. Connect to it and enjoy your internet!
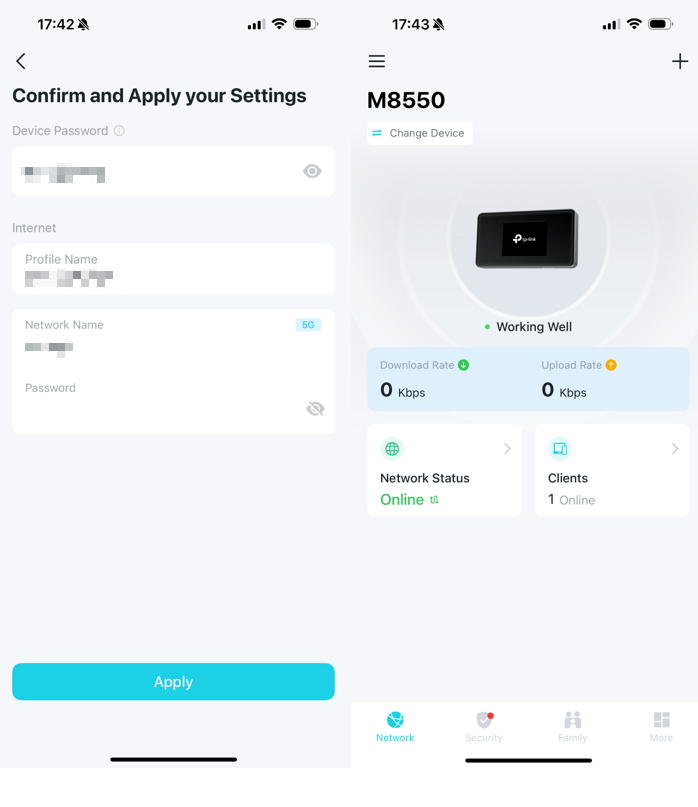
Get to know more details of each function and configuration, please go to the Download Center to download the manual of your product.
ค้นหาเพิ่มเติม
คำถามที่พบบ่อยนี้มีประโยชน์หรือไม่?
ความคิดเห็นของคุณช่วยปรับปรุงเว็บไซต์นี้

TP-Link Community
Still need help? Search for answers, ask questions, and get help from TP-Link experts and other users around the world.