Getting Started with the VIGI App
Contents
Get started with the TP-Link VIGI App
Easily manage devices with the TP-Link VIGI App
Introduction
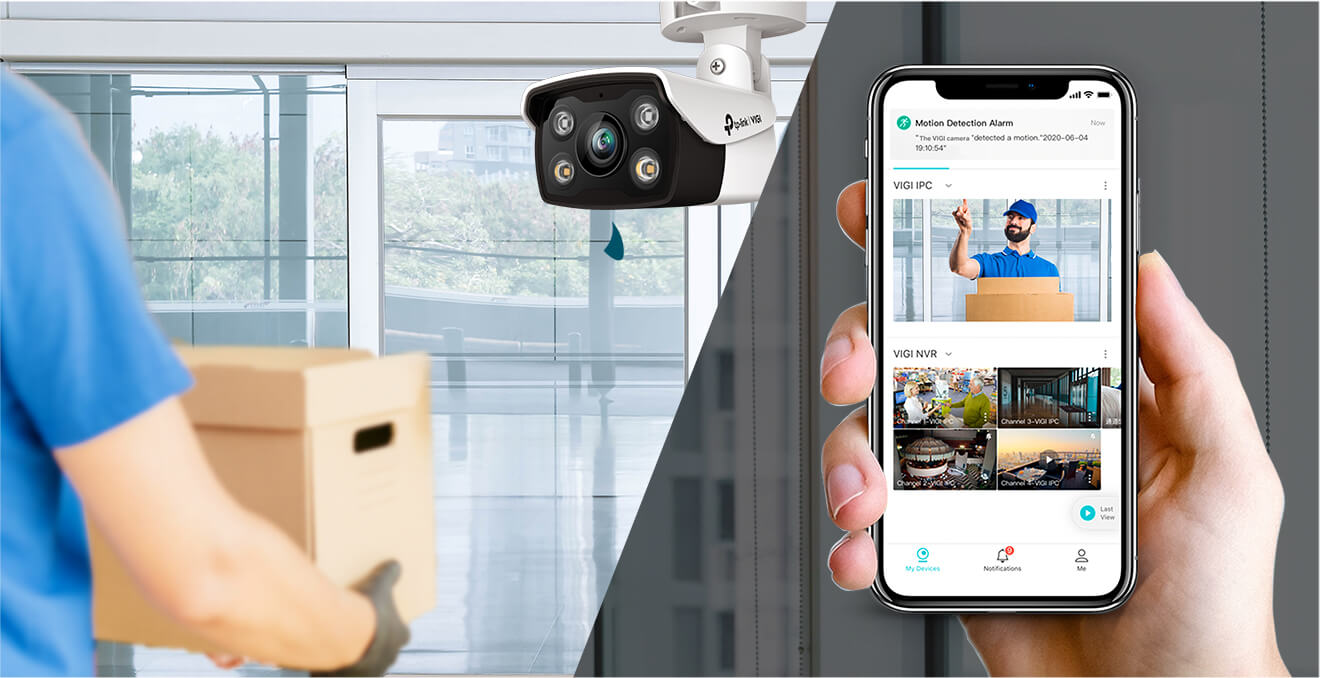
The TP-Link VIGI App is designed for VIGI network cameras and NVRs that are dedicated to protecting your business. It allows you to easily add, configure, monitor, and control your connected devices. Simply create an account and add network cameras to it to enjoy real-time video, anytime, anywhere. Moreover, it also allows you to play back videos whenever you need. With the VIGI App, you can get instant notifications when motion is detected and know what happened. This article uses a VIGI network camera as an example to demonstrate the configuration process.
Requirements
- VIGI App installed on a mobile device
- VIGI Camera or VIGI NVR
Note: Features available in VIGI devices may vary by model and software version.
Configuration
Follow the steps below to get started with the VIGI App. You can use the app to add and manage devices, view live video, configure settings, and receive event notifications.
Get started with the TP-Link VIGI App
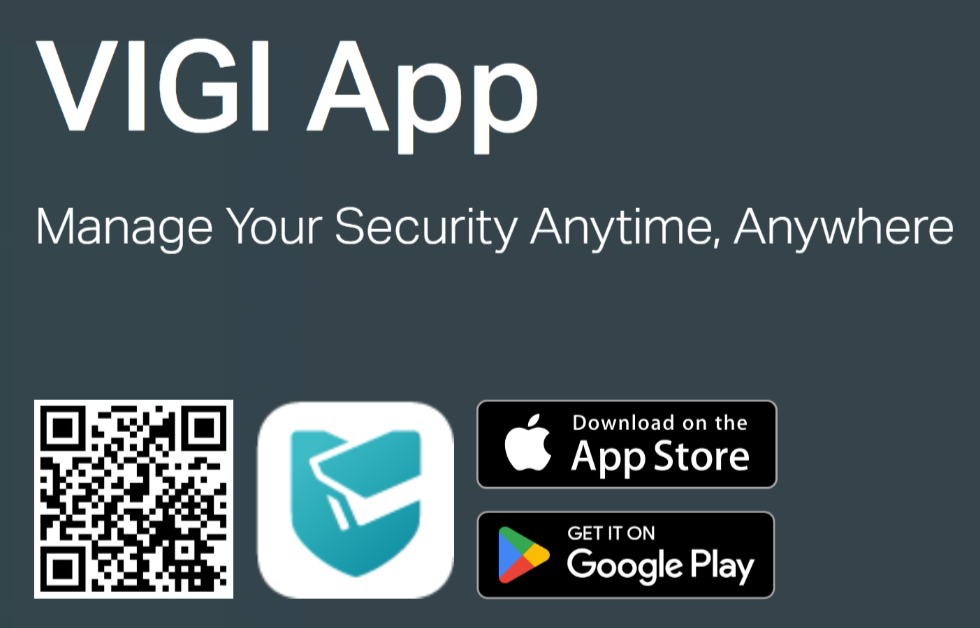
Step 1. Download and install the VIGI App from the Apple App Store or Google Play
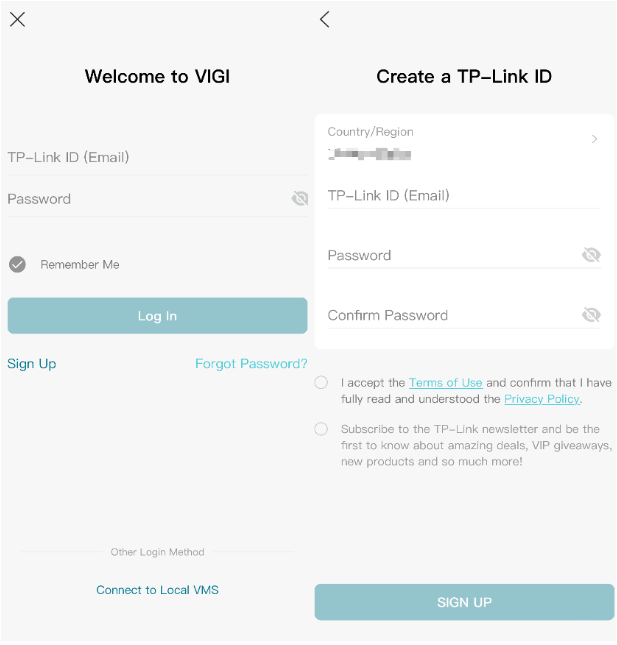
Step 2. Open the VIGI App and log in with your TP-Link ID. If you don’t have an account, sign up first.
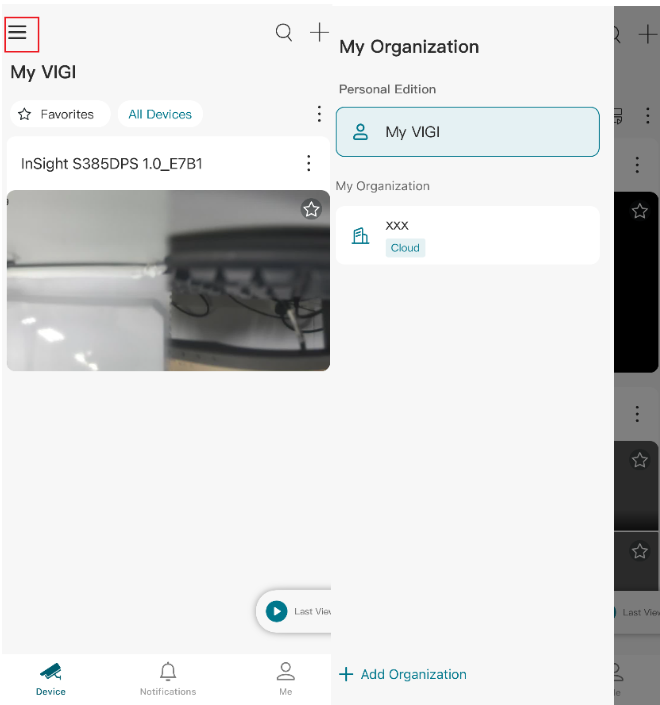
Step 3. Tap the Three-Line icon on the top left. You can select Personal Edition (My VIGI) or My Organization mode. Here we take My VIGI as an example.
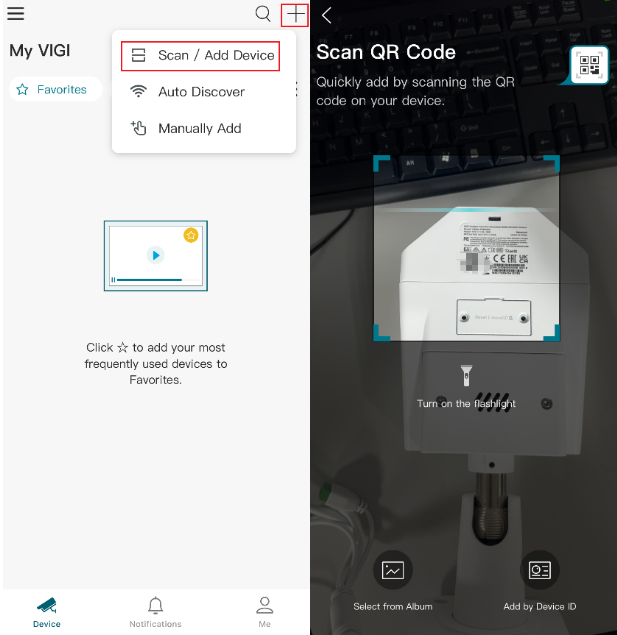
Step 4. Tap the + button on the top right.
There are three methods available for adding devices in the VIGI App:
- Scan / Add Device: Scan the QR code on the product label to quickly add a device. This is the recommended method for most users.
- Auto Discover: Automatically search for VIGI devices on the same local network.
- Manually Add: Add a device by entering the device information manually.
In this example, we use Scan / Add Device to add a VIGI Camera.
Note: You can find the QR code printed on your camera's product label.
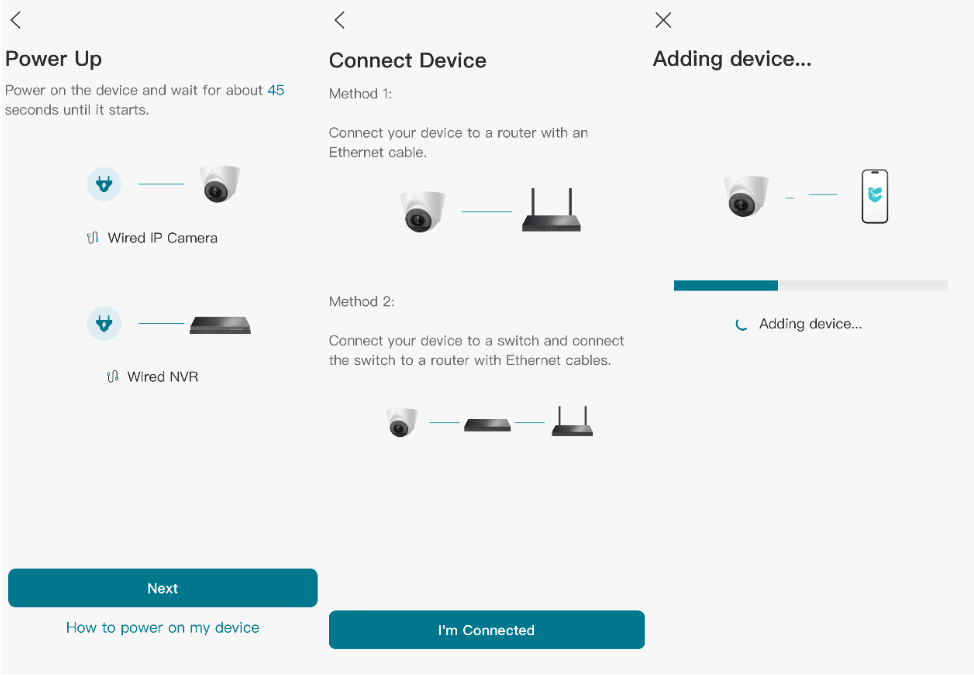
Step 5. Follow the on-screen instructions and set a device password to activate the camera.
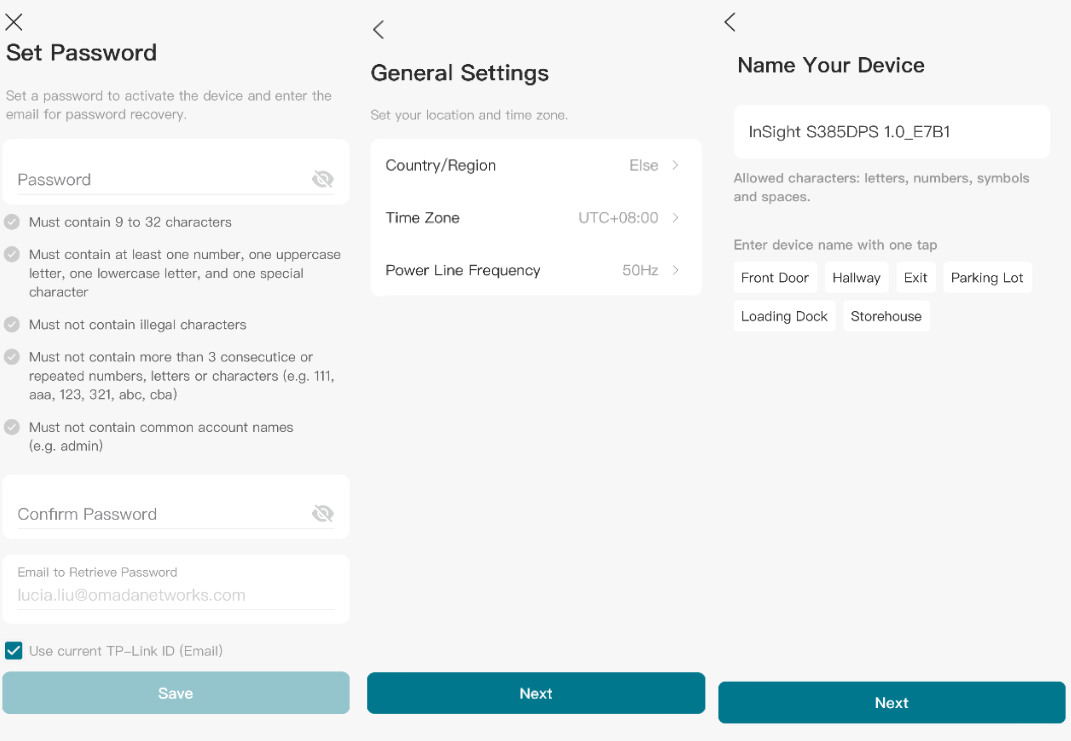
Step 6. Set the time zone and give a name to your device.
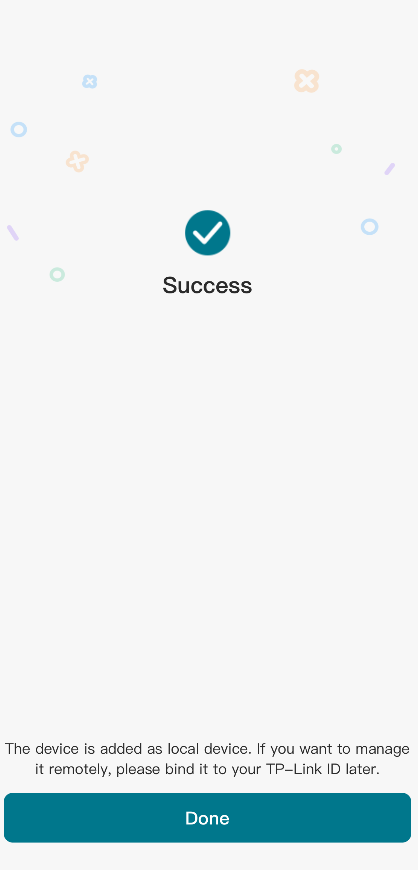
Step 7. Tap Done to complete the setup. You can now view and manage the camera in the VIGI App.
Easily manage devices with the TP-Link VIGI App
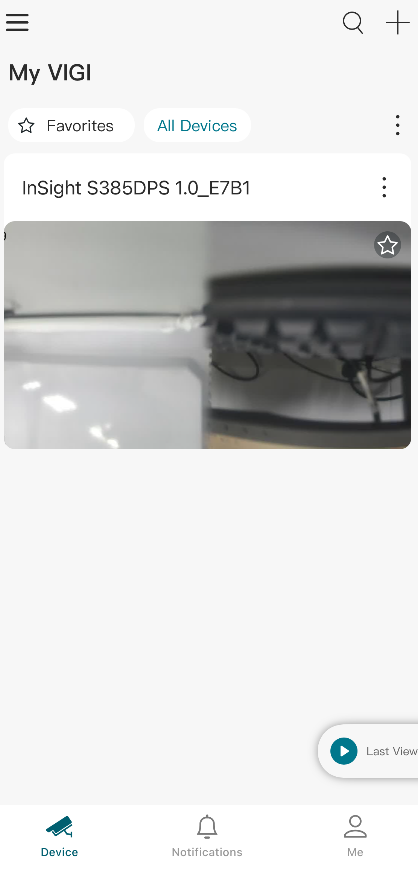
After adding devices to the VIGI App, you can view live video and monitor your site remotely through the Live View page.
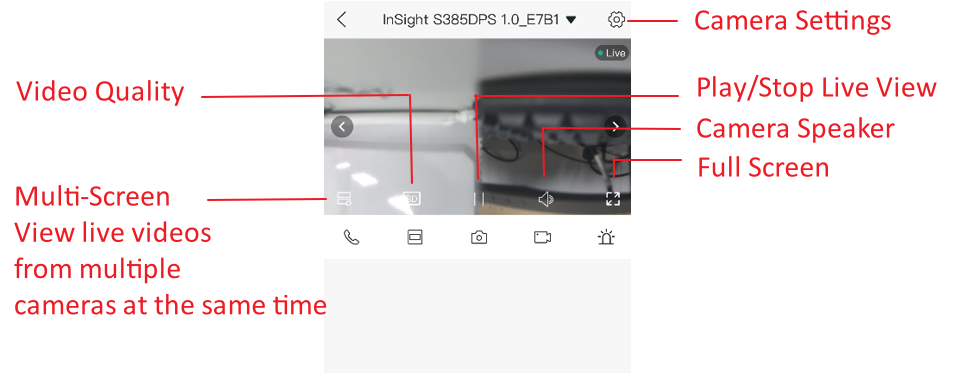
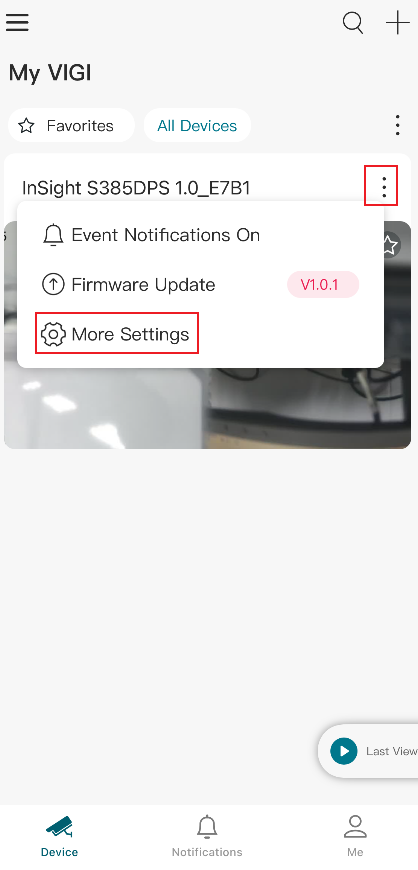
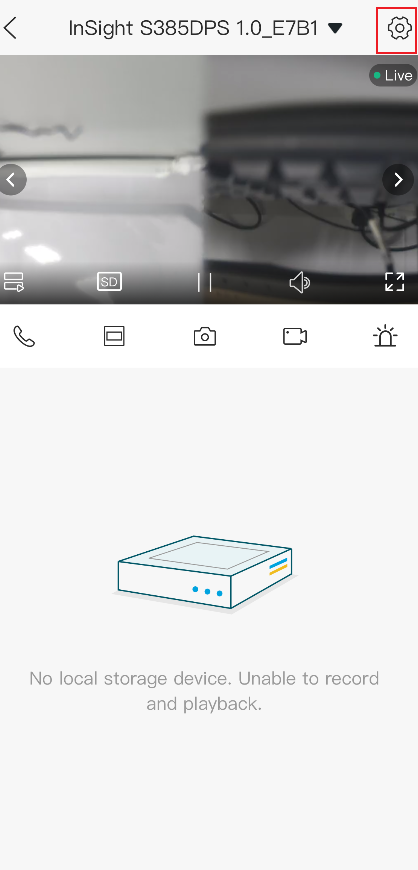
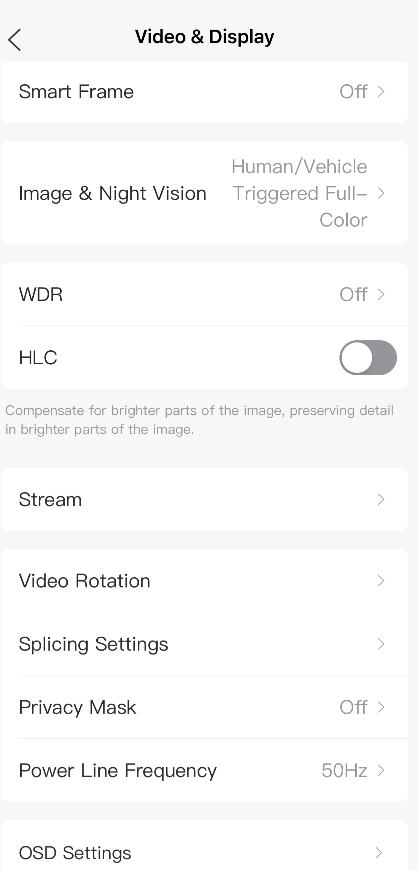
You can adjust the live view display on the Device Control page. You can tap More Settings on the Device page or tap the gear icon on the Live View page to enter the Device Settings page. On the Device Settings page, you can customize camera settings to meet different deployment requirements.
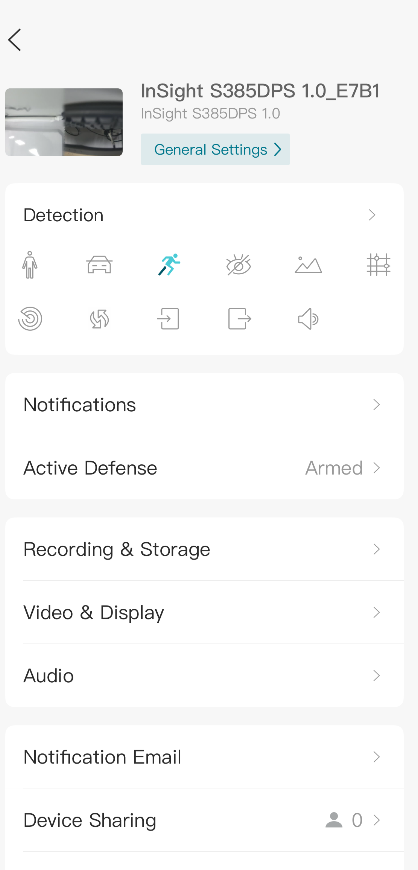
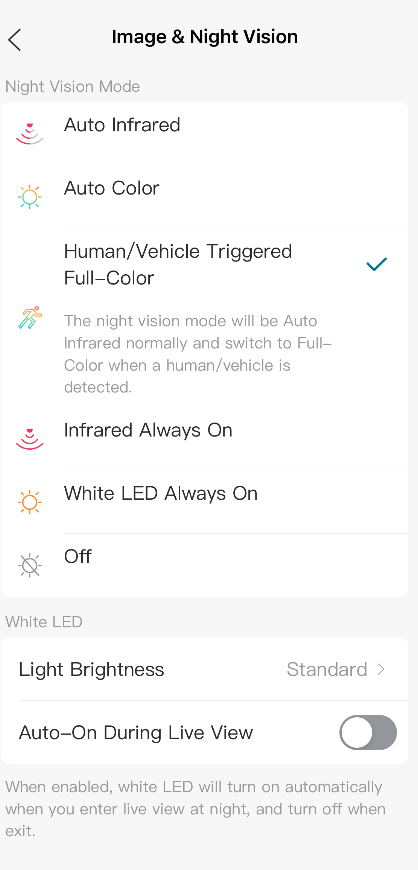
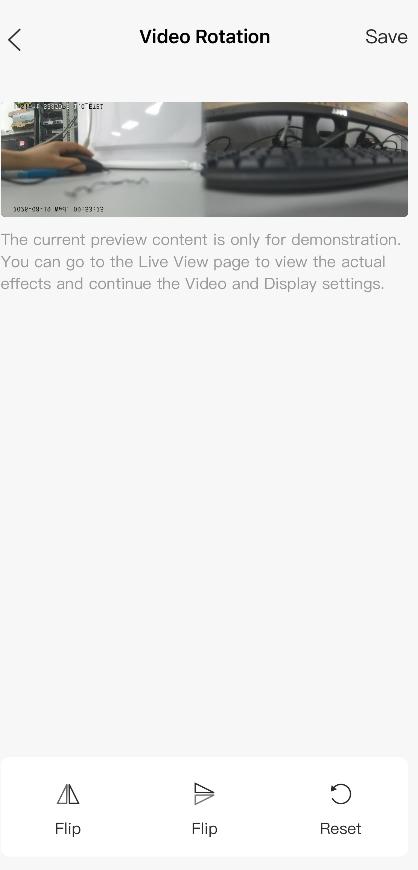
Follow the app instructions to configure the settings. You can enable HLC, set LED status, change the video direction, configure WDR, disable the microphone or adjust the microphone volume (for certain cameras), adjust the speaker/alarm volume (for certain cameras), set the night vision, and Light Brightness (for certain cameras).
Get instant notifications
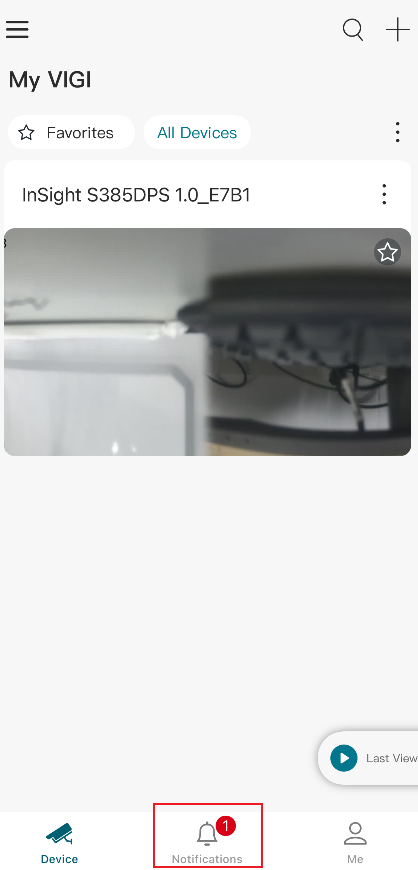
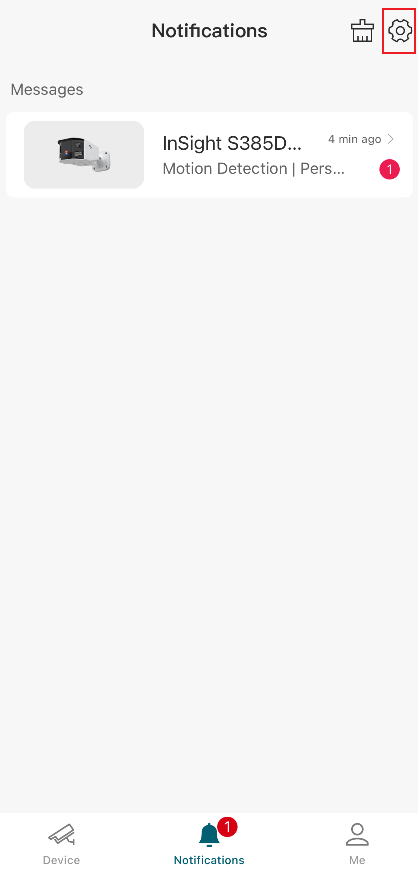
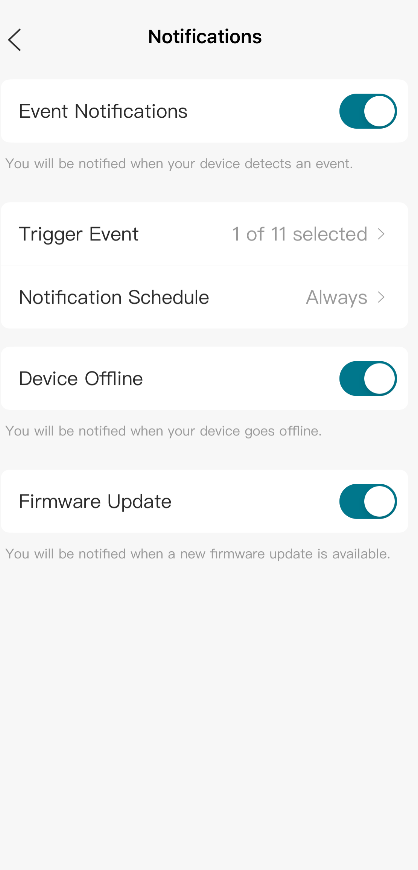
The VIGI App supports multiple event detection features, including Motion Detection, Intrusion Detection, Line Crossing Detection, Camera Tampering, and other smart detection functions.
Conclusion
You have now completed the basic setup and management of VIGI devices using the VIGI App. With device onboarding, live view, playback, notifications, and device settings available in a single application, the VIGI App helps simplify daily monitoring and device management.
To learn more about each function and configuration, please visit Support Home to download or check the manual for your product.
QA
Q1: Why can't the VIGI App find my camera?
A1: Check if the camera is powered on. Ensure that both the camera and your mobile device are connected to the same router/gateway and have access to the internet.
Q2: Can I view live videos remotely?
A2: Yes. After the device is added and configured correctly, you can access live videos remotely through the VIGI App.
Looking For More
Был ли этот FAQ полезен?
Ваш отзыв поможет нам улучшить работу сайта.



TP-Link Community
Still need help? Search for answers, ask questions, and get help from TP-Link experts and other users around the world.