How to Share VIGI Devices with Other Users
Contents
Share VIGI devices with other users
Introduction
The Device Sharing feature in the VIGI App allows you to share VIGI security devices with multiple user accounts. This article will guide you through the process of sharing your VIGI devices with others in the VIGI App.
Requirements
- VIGI App (latest version)
- Supported VIGI camera or NVR
- A registered TP-Link account for the device owner
- A registered TP-Link account for each invited user
Note:
1. Ensure that both the VIGI App and the device firmware are up to date.
2. Device Sharing is not supported on all models. If the feature is unavailable, the VIGI App will indicate that the device does not support Device Sharing.
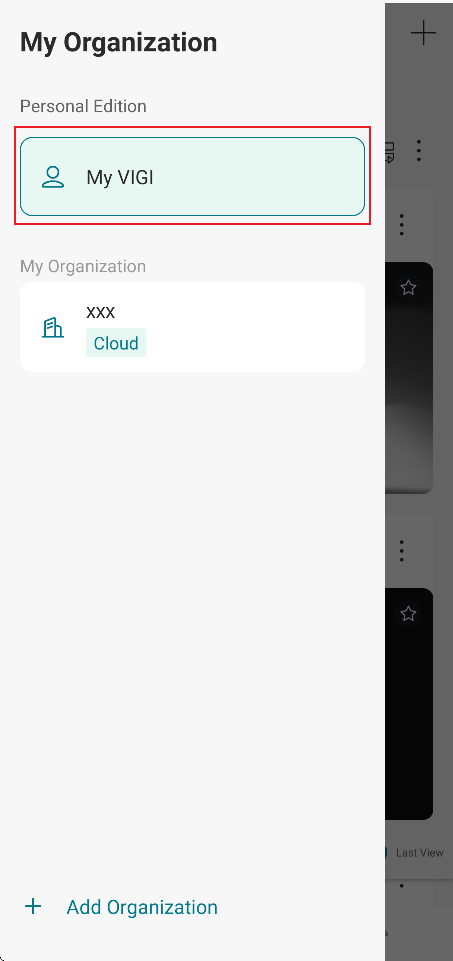
3. Device Sharing is available only in My VIGI (Personal Version).
Configuration
Share VIGI devices with other users
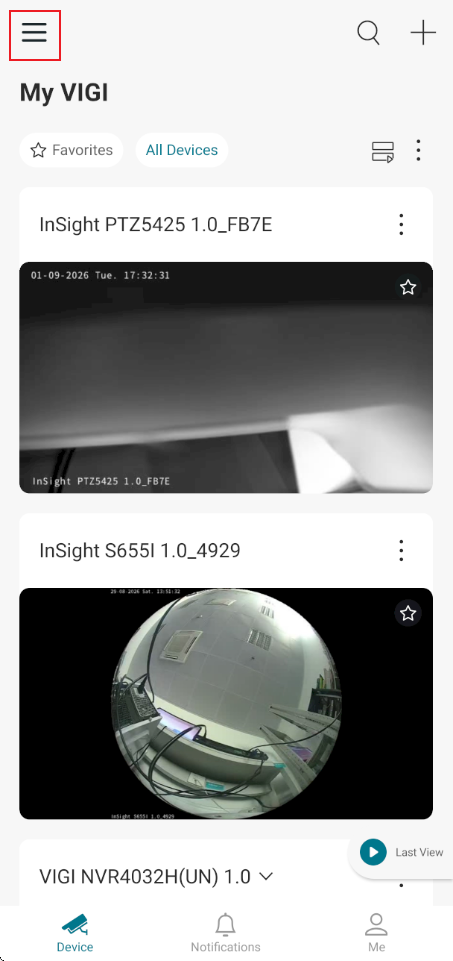
Step 1. Switch to My VIGI (Personal Version)
Navigate to Device > Menu (☰) > My VIGI (Personal Version).
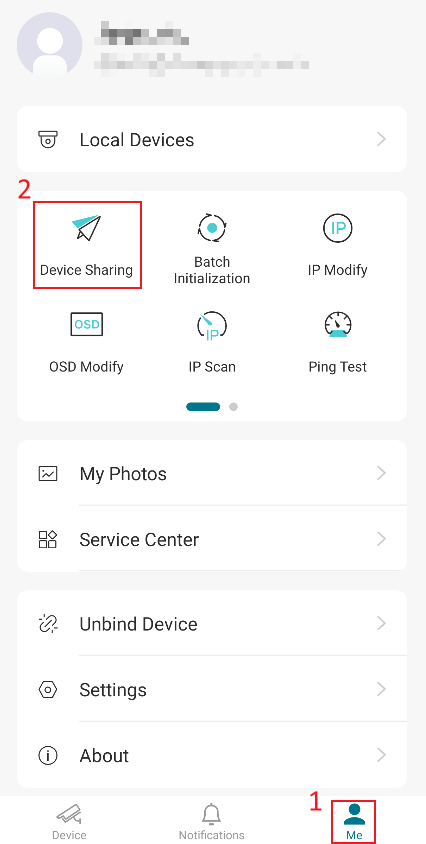
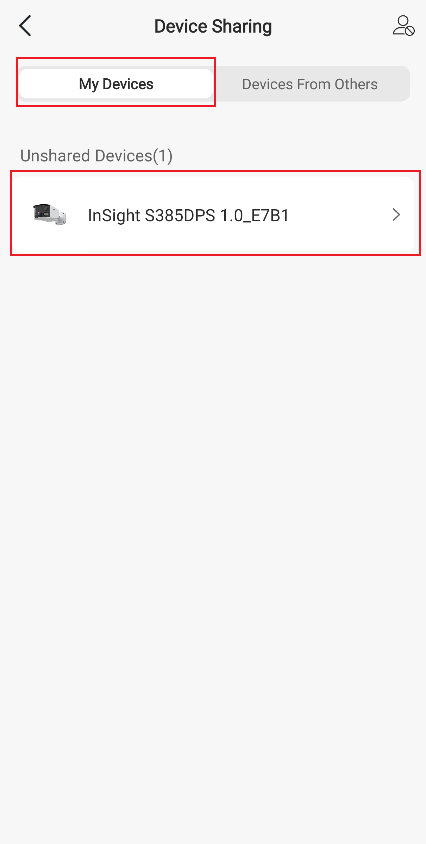
Step 2. Select the device to share
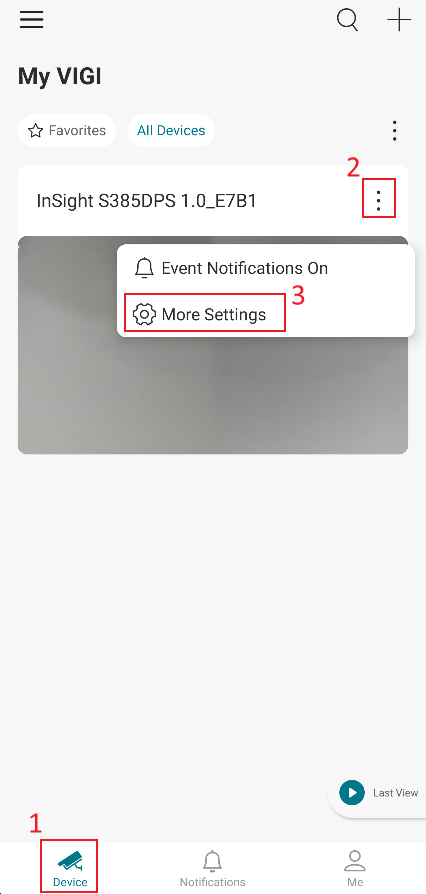
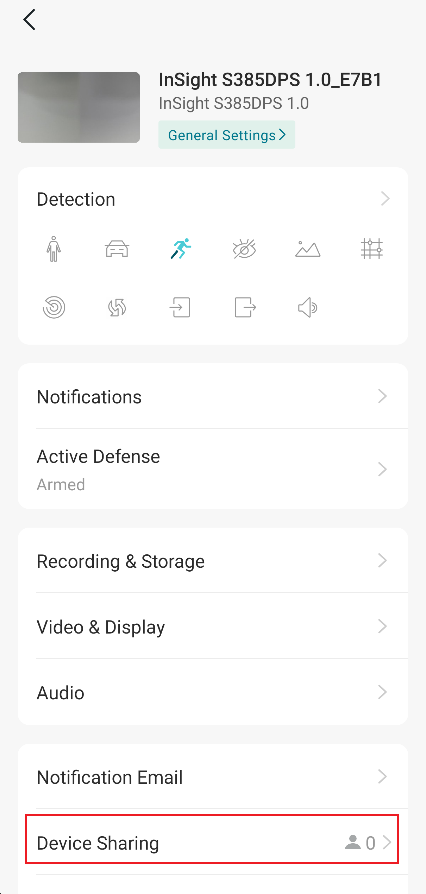
Navigate to Me > Device Sharing and select the target device from the Unshared Devices list.
Alternatively, navigate to:
Device > Three-dot Menu > More Settings > Device Sharing
Step 3. Send a sharing invitation
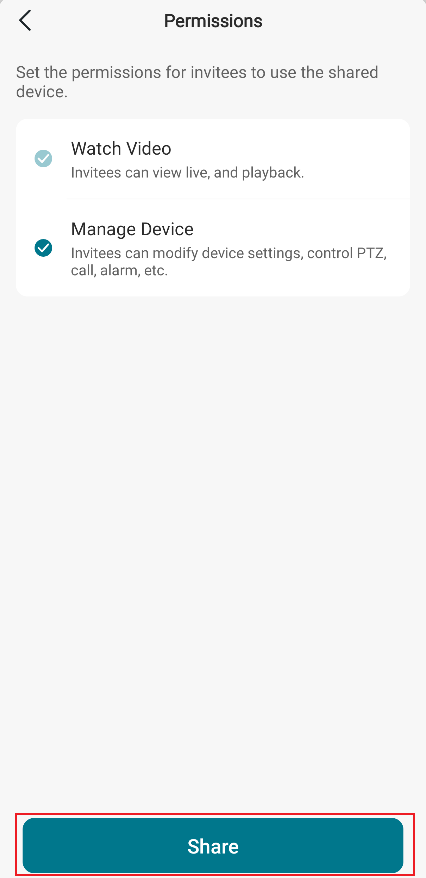
Select the permission level to be granted to the invited user and tap Share.
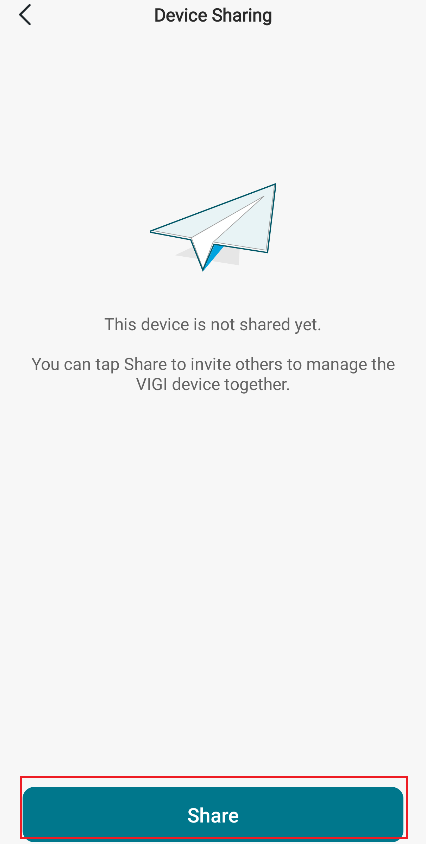
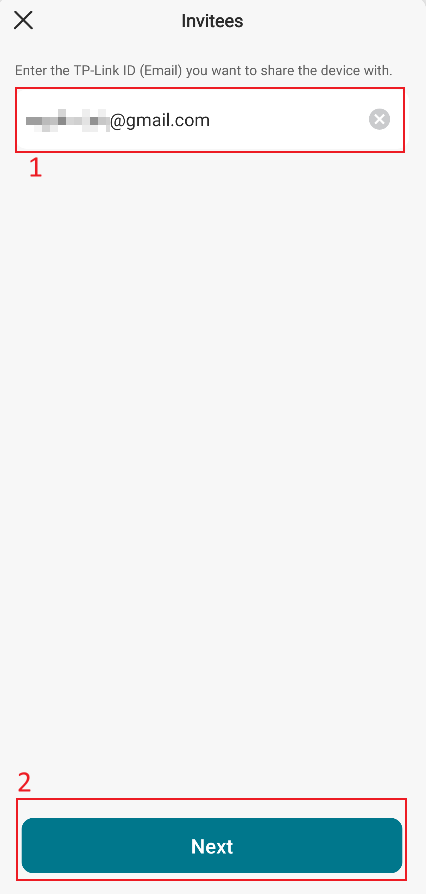
Note: The invitee must have a registered TP-Link account before a sharing invitation can be sent.
Step 4. Configure user permissions
Configure the permissions for the invitee. Select the desired permission level, then click Share and Got It. The invitation will be sent to the invitee.
The following permission levels are available:
• Watch Video: Allows viewing live video and playback recordings (enabled by default).
• Manage Device: Allows modification of device settings and performance of management operations, such as PTZ control, two-way audio, and alarm configuration.
To grant management privileges for a VIGI device, assign the Manage Device permission.
_20260907053550x.png)
Step 5. Accept the sharing invitation
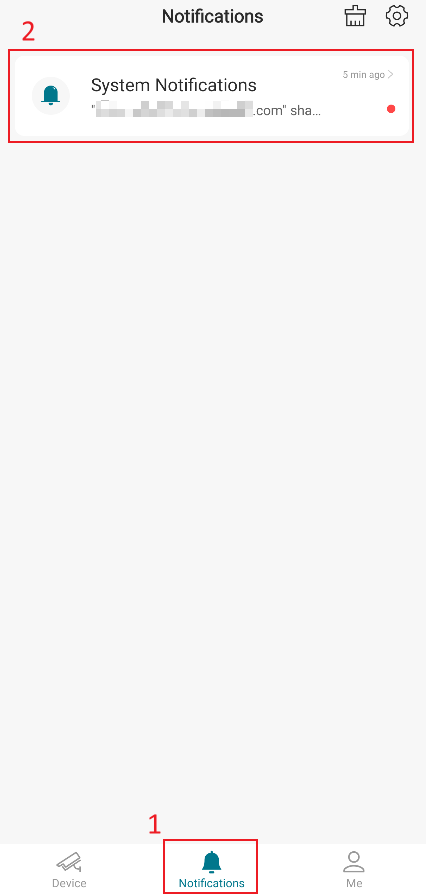
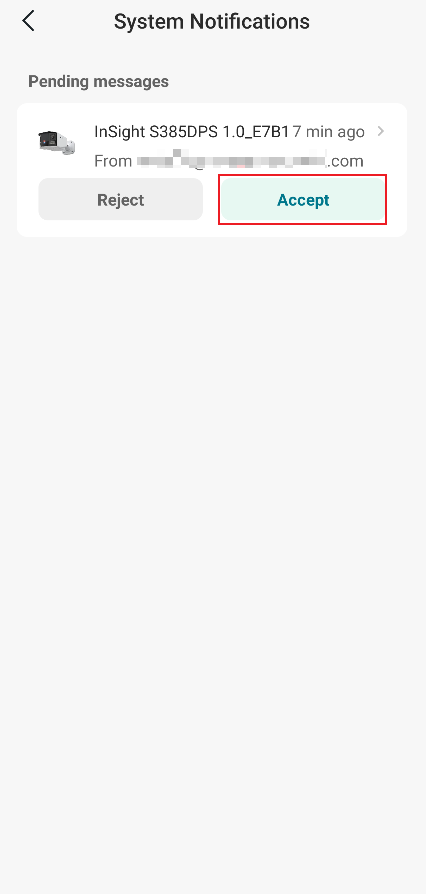
The invited user must sign in to the VIGI App, navigate to Notifications, review the invitation, and tap Accept.
Once accepted, the shared device becomes accessible under the invited user's account.
Step 6. Access shared devices
After you accept the invitation, you can access shared devices from the Device page.
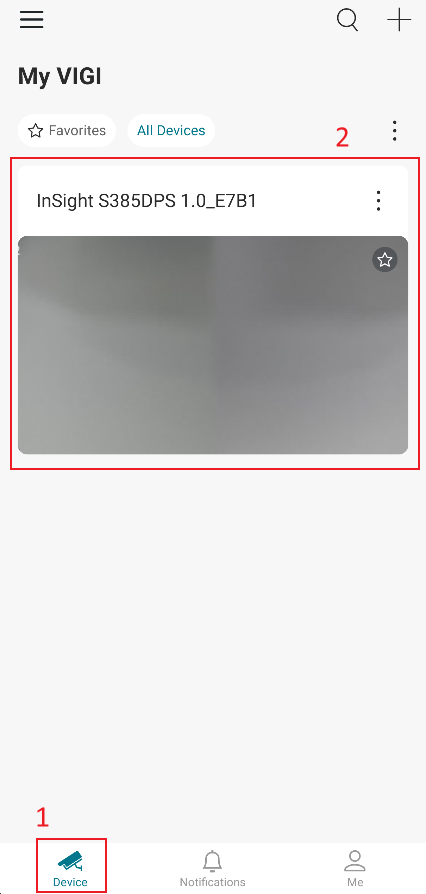
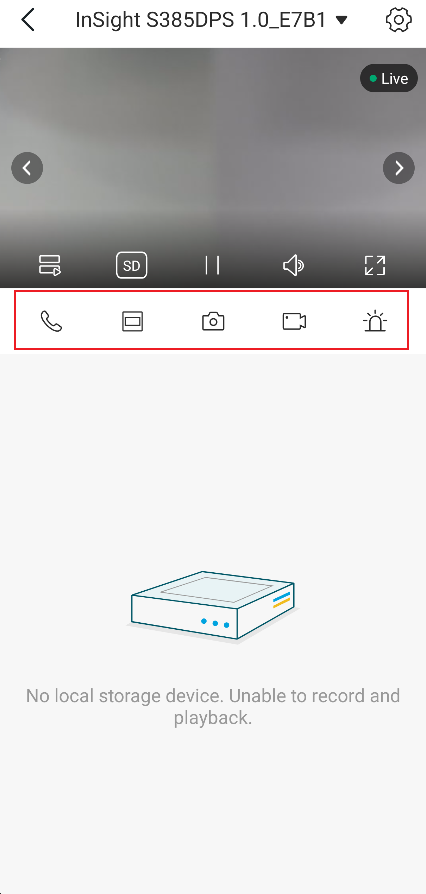
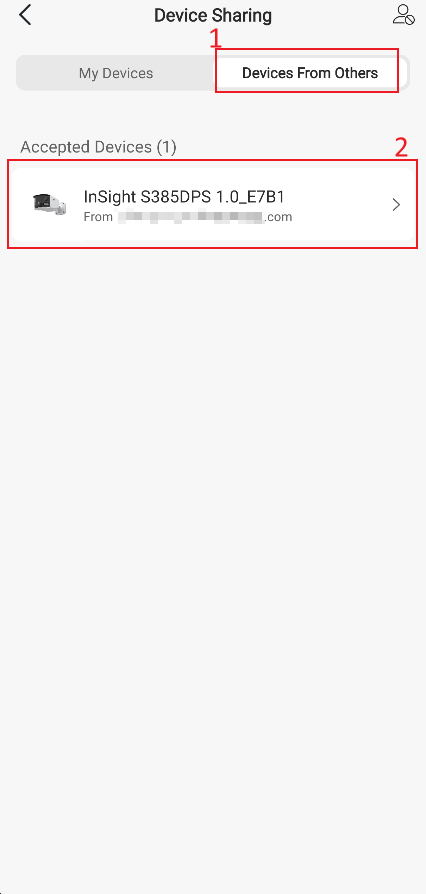
Accepted devices can also be viewed under:
Me > Device Sharing > Devices From Others
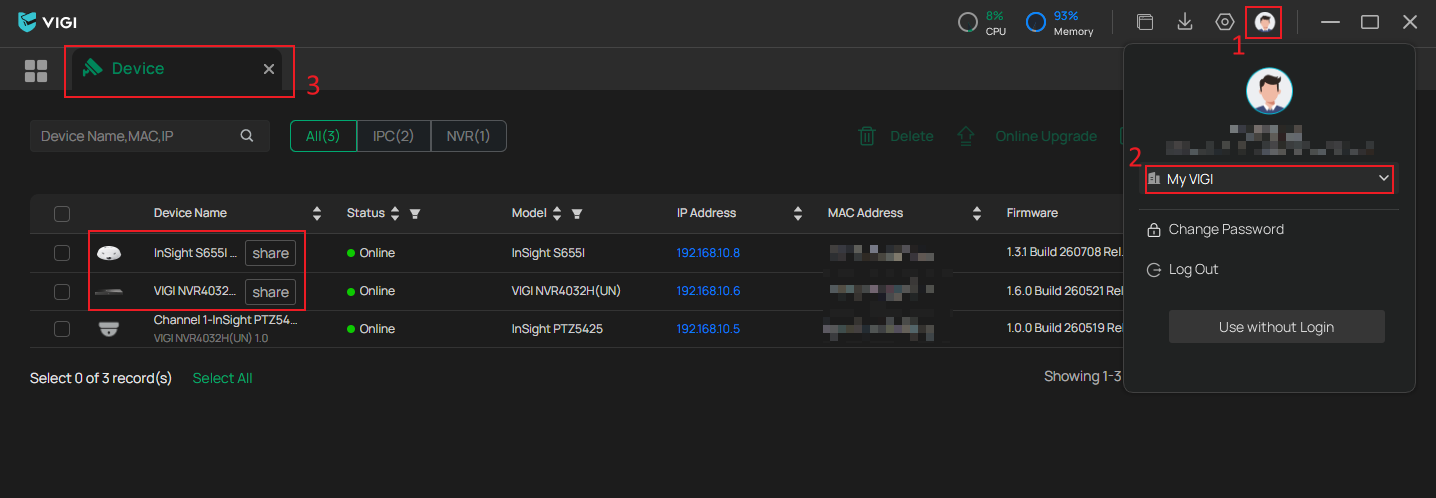
Shared devices are also accessible through VIGI PC Client. After signing in with the invited account and selecting My VIGI, shared devices are displayed on the Device page and identified with a Shared label.
Manage shared devices
Modify user permissions
Navigate to:
Me > Device Sharing > Shared Devices.
Select the shared device and modify the permission level assigned to the invited user.
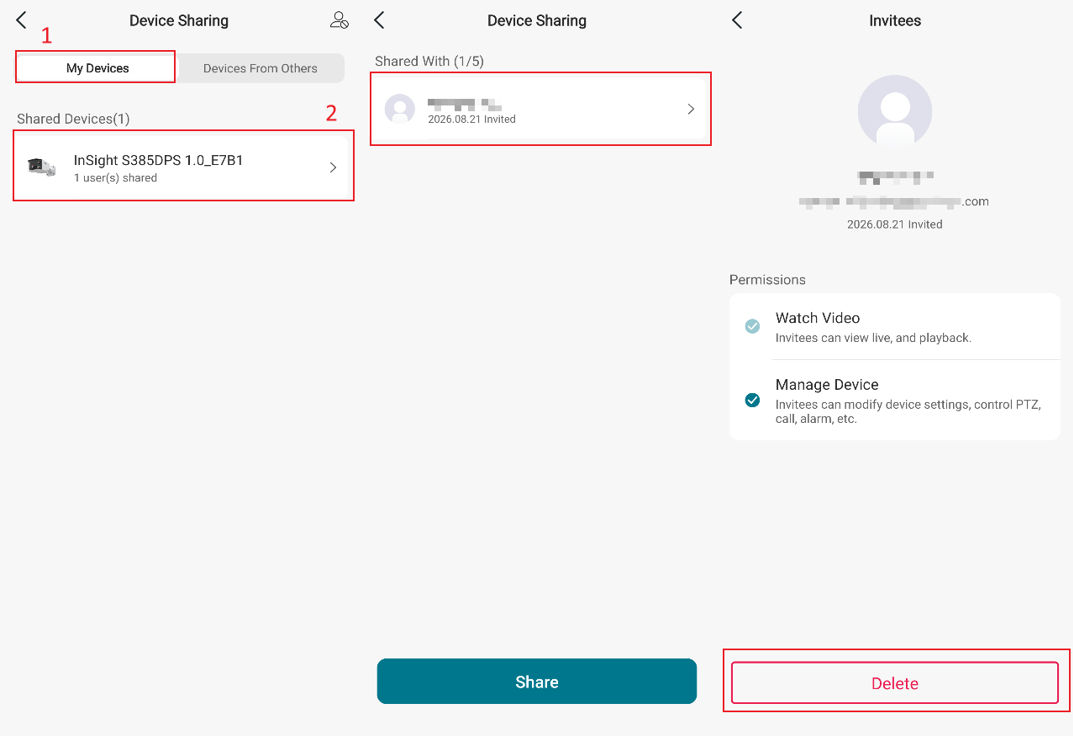
Stop device sharing
To revoke access, navigate to:
Me > Device Sharing > Shared Devices.
Select the device, choose the corresponding shared account, tap Delete, and confirm the action.
Once removed, the invited user will no longer be able to access the shared device.
Conclusion
The Device Sharing feature provides a secure and flexible way to grant access to VIGI devices without sharing account credentials. By assigning appropriate permission levels, device owners can control how shared users interact with devices and can modify or revoke access at any time through the VIGI App.
To learn more about each function and configuration, please visit Support Home to download or check the manual for your product.
QA
Q1: What is the difference between Device Sharing and just several users using the same login credentials on the VIGI App?
A1: Compared with sharing account credentials directly, Device Sharing allows users to access devices with their own TP-Link accounts, while enabling the device owner to modify the invitee's permissions at any time, making device access more secure, flexible, and convenient.
Q2: Why is the Device Sharing option missing from the Me page in my VIGI App?
A2: Please go to Device > click on the three-bar icon in the left corner and ensure that you are in the VIGI Personal Edition.
Q3: Can I access and manage a VIGI device on other VIGI platforms after it has been shared through the VIGI App?
A3: You can view/manage the shared devices in the VIGI App and VIGI PC Client. The VIGI devices shared from the VIGI App cannot be viewed or managed through VIGI VMS or VIGI Cloud VMS.
Looking For More
Is this faq useful?
Your feedback helps improve this site.



TP-Link Community
Still need help? Search for answers, ask questions, and get help from TP-Link experts and other users around the world.