How to Set Up Wake-on-LAN on a TP-Link Wireless Router
This guide explains how to configure Wake-on-LAN (WoL) on both your computer and a TP-Link wireless router or Deco so you can power on a PC remotely from outside your home network. Follow the steps below to learn how to wake on LAN using your TP-Link router.
Key Takeaways
- Wake-on-LAN (WoL) allows a computer to be powered on remotely by sending a network message, but both the computer's mainboard and wired network adapter must support the feature.
- Setting up WoL on a TP-Link router requires completing steps on both the computer side (BIOS settings and network adapter settings) and the router side (IP and MAC binding, address reservation, and port forwarding).
- To wake a PC from outside the local network (WAN side), you need the router's WAN IP address and a port opened via port forwarding. Port 3000 is used as an example in this guide.
- Because WAN IP addresses are dynamic and can change, setting up Dynamic Domain Name System (DDNS) on the router is recommended so you can use a fixed domain name instead of the WAN IP when sending the wake signal.
- A WoL app such as RemoteBoot (iOS) is required to send the magic packet that powers on the target PC. Without this app, the setup will not work.
What is Wake-on-LAN?
Wake-on-LAN (WoL) is an Ethernet or Token Ring computer networking standard that allows a computer to be turned on or awakened by a network message. The message is usually sent by a program executed on other devices. It is also possible to initiate the message from another network by using subnet-directed broadcasts or a WOL gateway service.
Hardware requirements
The mainboard and the wired network adapter must support Wake-on-LAN.
Software requirements
WakeOnLanGui, LanHelper for Windows, or RemoteBoot for IOS
One of these apps is required to send the magic packet to the target PC — without it, the Wake-on-LAN setup will not work.
Here we take RemoteBoot as an example.
Configure Your Computer for Wake-on-LAN
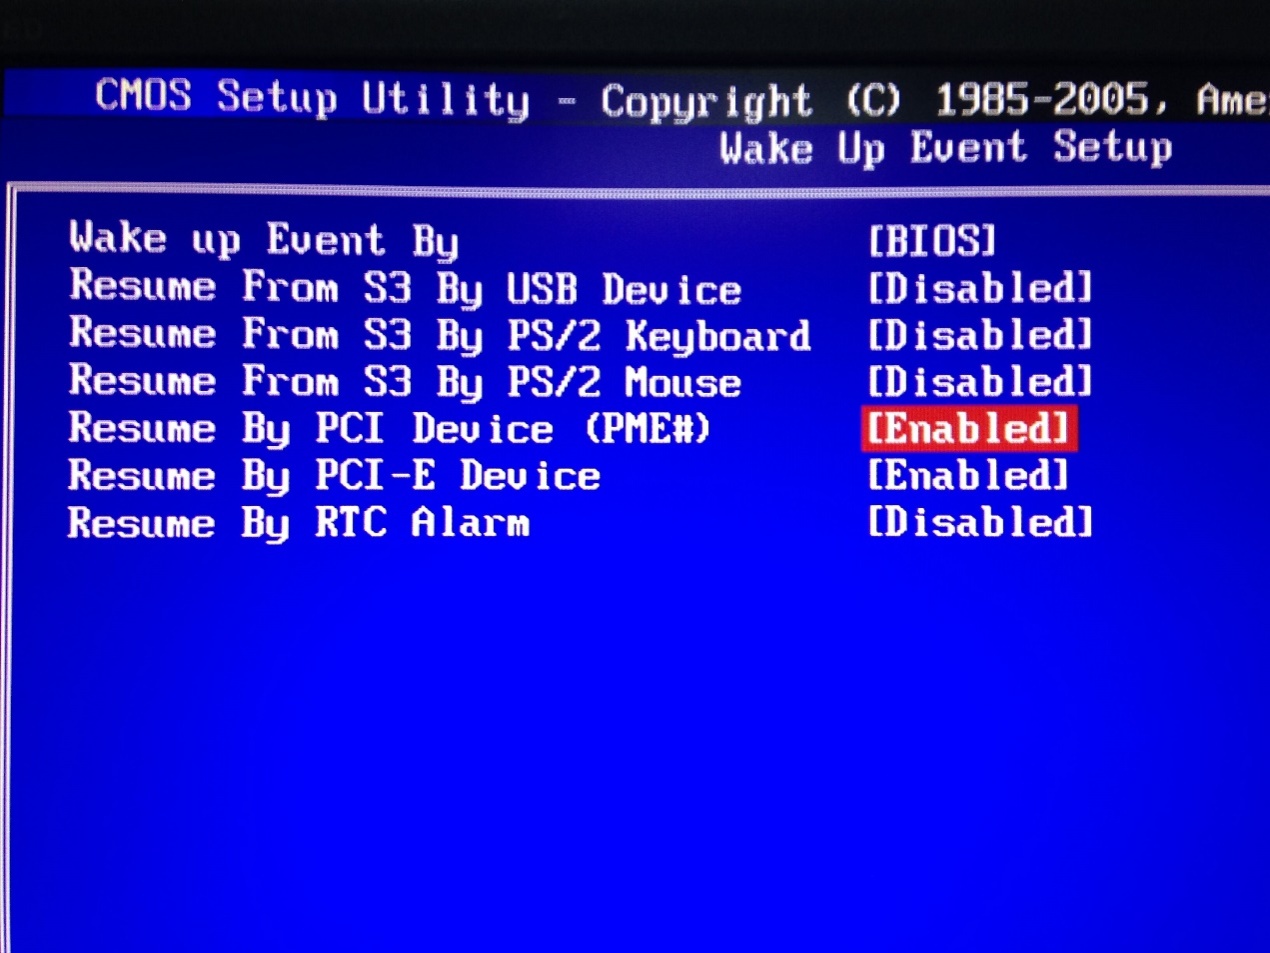
1. Enter BIOS when starting up the computer. Then enable "Resume by PCI Device" and "Resume by PCI-E Device". This option is usually found in the power management menu.
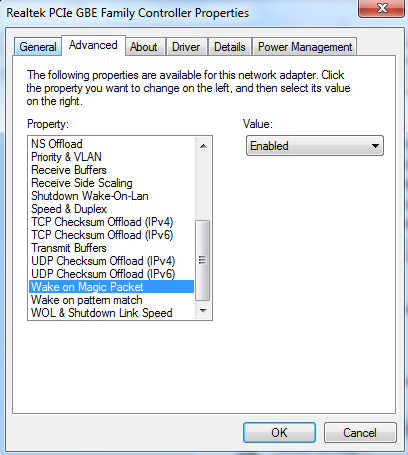
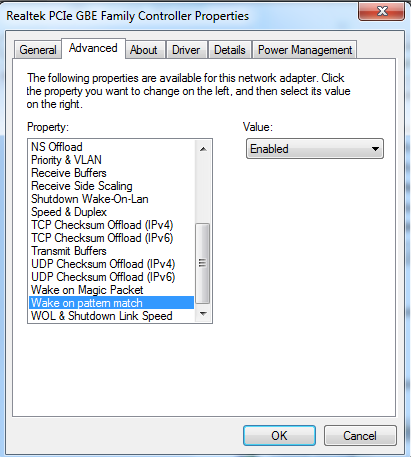
2. Turn on the computer and go to Control Panel--Network and Internet--Network and Sharing Center--Local area connection--Properties--Configure--Advanced. Then enable Shutdown Wake-On-Lan, Wake on Magic Packet, and Wake on pattern match.

After the settings are done on the computer, we need to do some settings on your Router.
TP-Link Router Setup for Wake-on-LAN
To complete the TP-Link WoL setup, you will need to configure a few settings on your router. The steps below cover IP and MAC address binding, address reservation, port forwarding, and sending the wake signal using RemoteBoot.
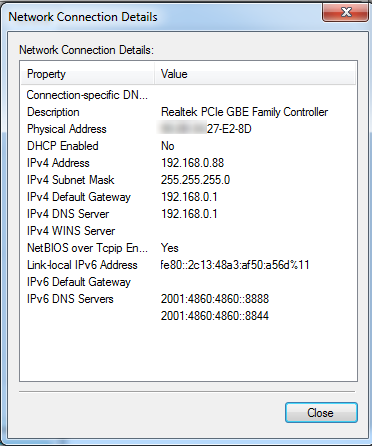
1. Check the MAC address and IP address of the computer that needs Wake-on-LAN. We call it PC 1 here.
2. Connect to the router via either Wi-Fi or Ethernet, visit https://tplinkwifi.net/, and log in with your password.
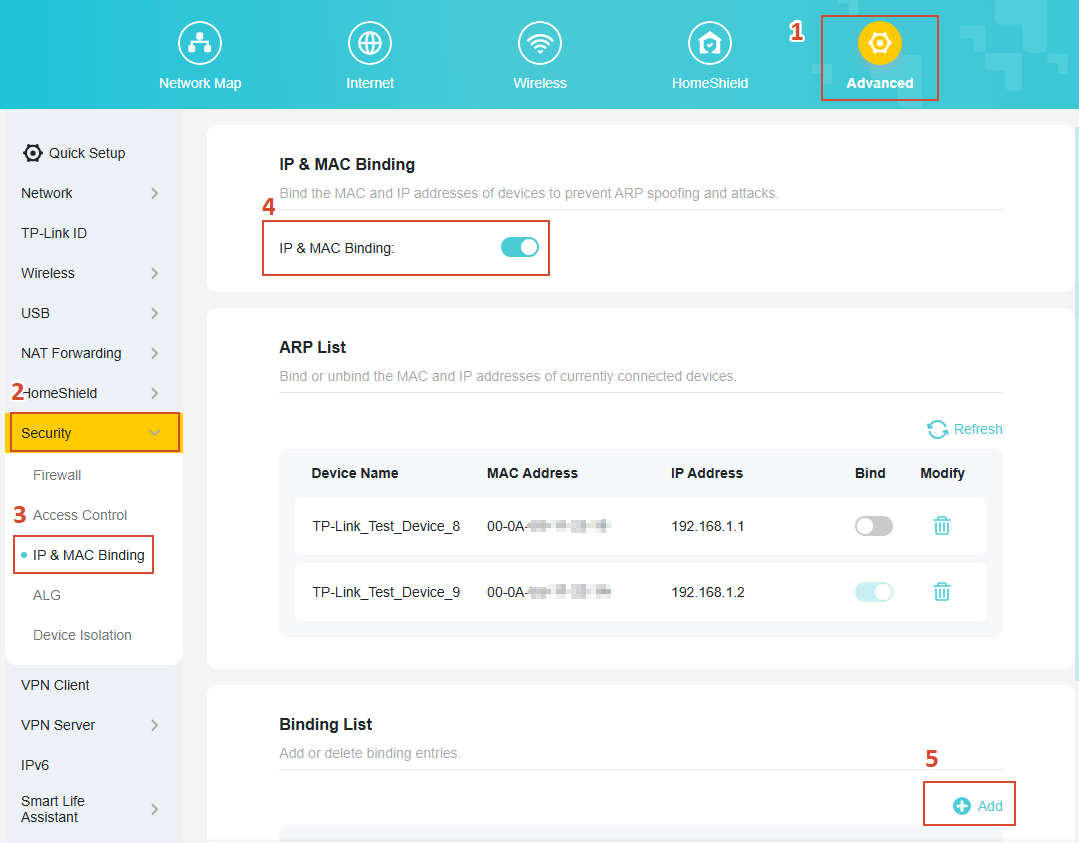
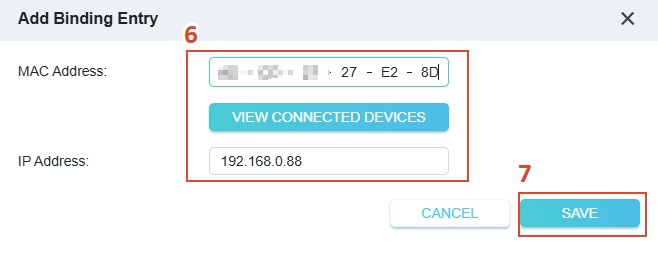
3. Go to Advanced > Security > IP&Mac Binding, enable the IP and MAC binding function. Click Add, and then input PC 1’s IP and MAC Address for binding. You may also click View Connected Devices and select it from the list.
3. Go to Advanced > Network > DHCP Server, click Add, and then input PC 1’s information to reserve its IP.

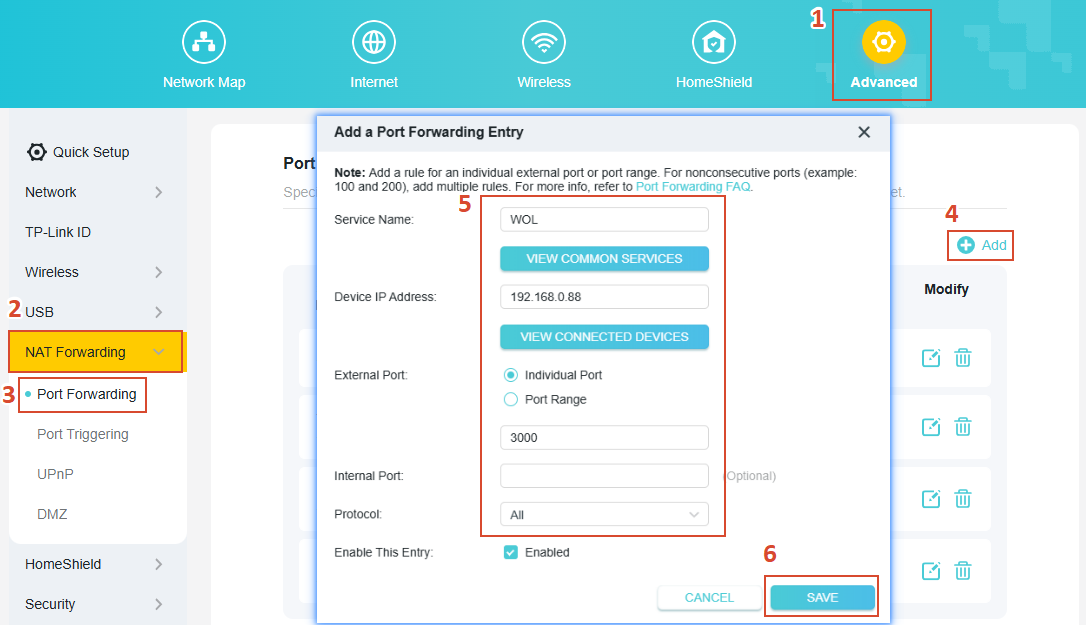
4. Go to Advanced > NAT Forwarding > Port Forwarding, click Add, and open port number 3000 for PC 1.
5. Go to Advanced > Network > Status, and check the WAN IP address of the router that PC 1 is connected to. In this example, the WAN IP is XX.XX.198.136.
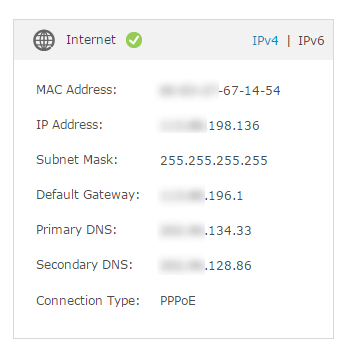
Note: The WAN IP address is usually a dynamic IP address and may change at any time. In this case, you may try to set up DDNS (Dynamic Domain Name System) on the router by following the instructions in "How to Set Up TP-Link DDNS on Your Wireless Router." On the RemoteBoot app, the IP will be a domain name you registered with DDNS instead of the WAN IP.
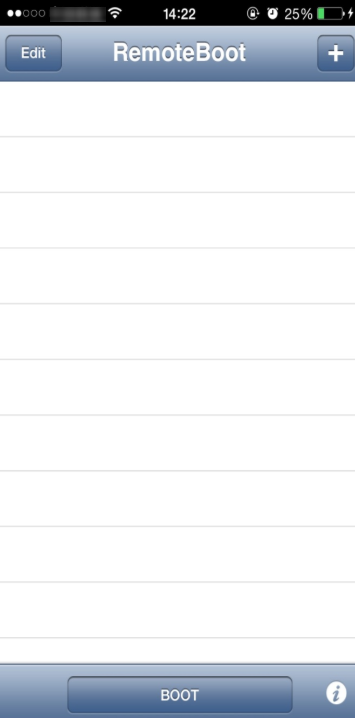
6. Run the RemoteBoot app on the iPhone from the WAN side. Then fill in the information like below and click BOOT. You can see PC 1 will start up after you click it.

If you run into any issues during setup, visit the TP-Link support page for additional help.
Looking For More
¿Es útil este artículo?
Tus comentarios nos ayudan a mejorar esta web.
14.0-A_normal_1584497163963a.png)

3.0_A_RGB_normal_1584493572647x.png)
TP-Link Community
Still need help? Search for answers, ask questions, and get help from TP-Link experts and other users around the world.