How to use Scenes function in Kasa app

HS100P3 , KB100 , EP40 , KL130 , KL110 , HS107 , KL110B , HS105 KIT , LB230 , HS103 , KL130B , LB130 , HS300 , KP115 , HS105 , LB110 , KD110 , HS200-BL , HS110 KIT , HS220 , HS200 , HS100 , HS220-LA , KB130 , KP100 , KP400 , KL120 , KP125 , KP200 , LB100 TKIT , LB200 , HS220-BL , LB120 , KP105 , HS210 KIT , LB100 , KP303 , HS110 , KL60 , HS210 , HS200-LA
Recent updates may have expanded access to feature(s) discussed in this FAQ. Visit your product's support page, select the correct hardware version for your device, and check either the Datasheet or the firmware section for the latest improvements added to your product. Please note that product availability varies by region, and certain models may not be available in your region.
Scenes let you create a shortcut to actions you do every day. In this way, you are able to control all the smart devices with one tap.
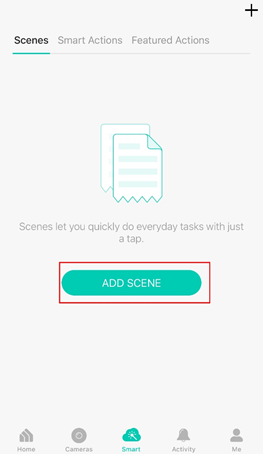
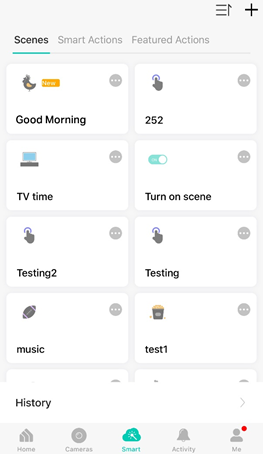
1. On the Kasa app, tap “Smart”, then you can see “ADD SCENE” on the Smart page. Tap “ADD SCENE” to customize your scene.
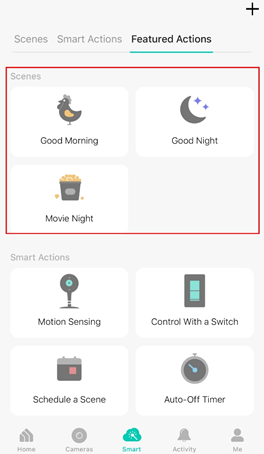
On the Featured Actions page, you can also find commonly-used templates, like Good Morning for turning on all your lighting and plugs, and Good Night for turning them off.
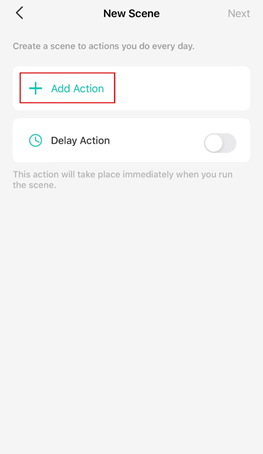
2. Now taking a customized scene as an example, tap “Add Action” to create a new scene.
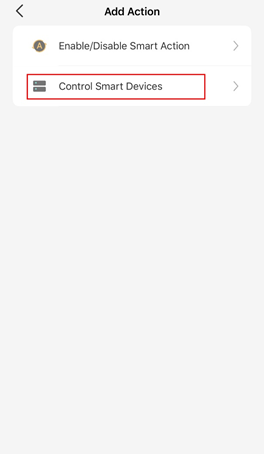
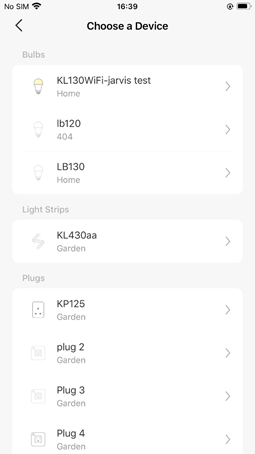
3. Tap Control Smart Devices to select the smart devices you want to run in the scene.
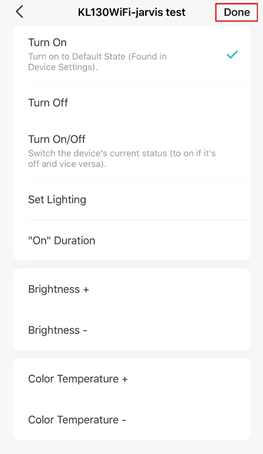
4. Then choose the device you want to run in the scene and customize the status of the smart device, such as turn on/off the smart plug. Then tap “Done”.
You can repeat Steps 2 to 4 to add more devices/ smart action in the scene.
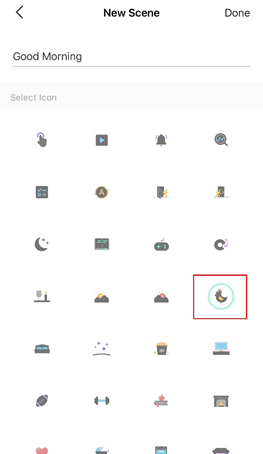
5. Give the scene a Name and choose an icon to distinguish your new scene from other existing ones. We provide a lot of designed icons for selection.
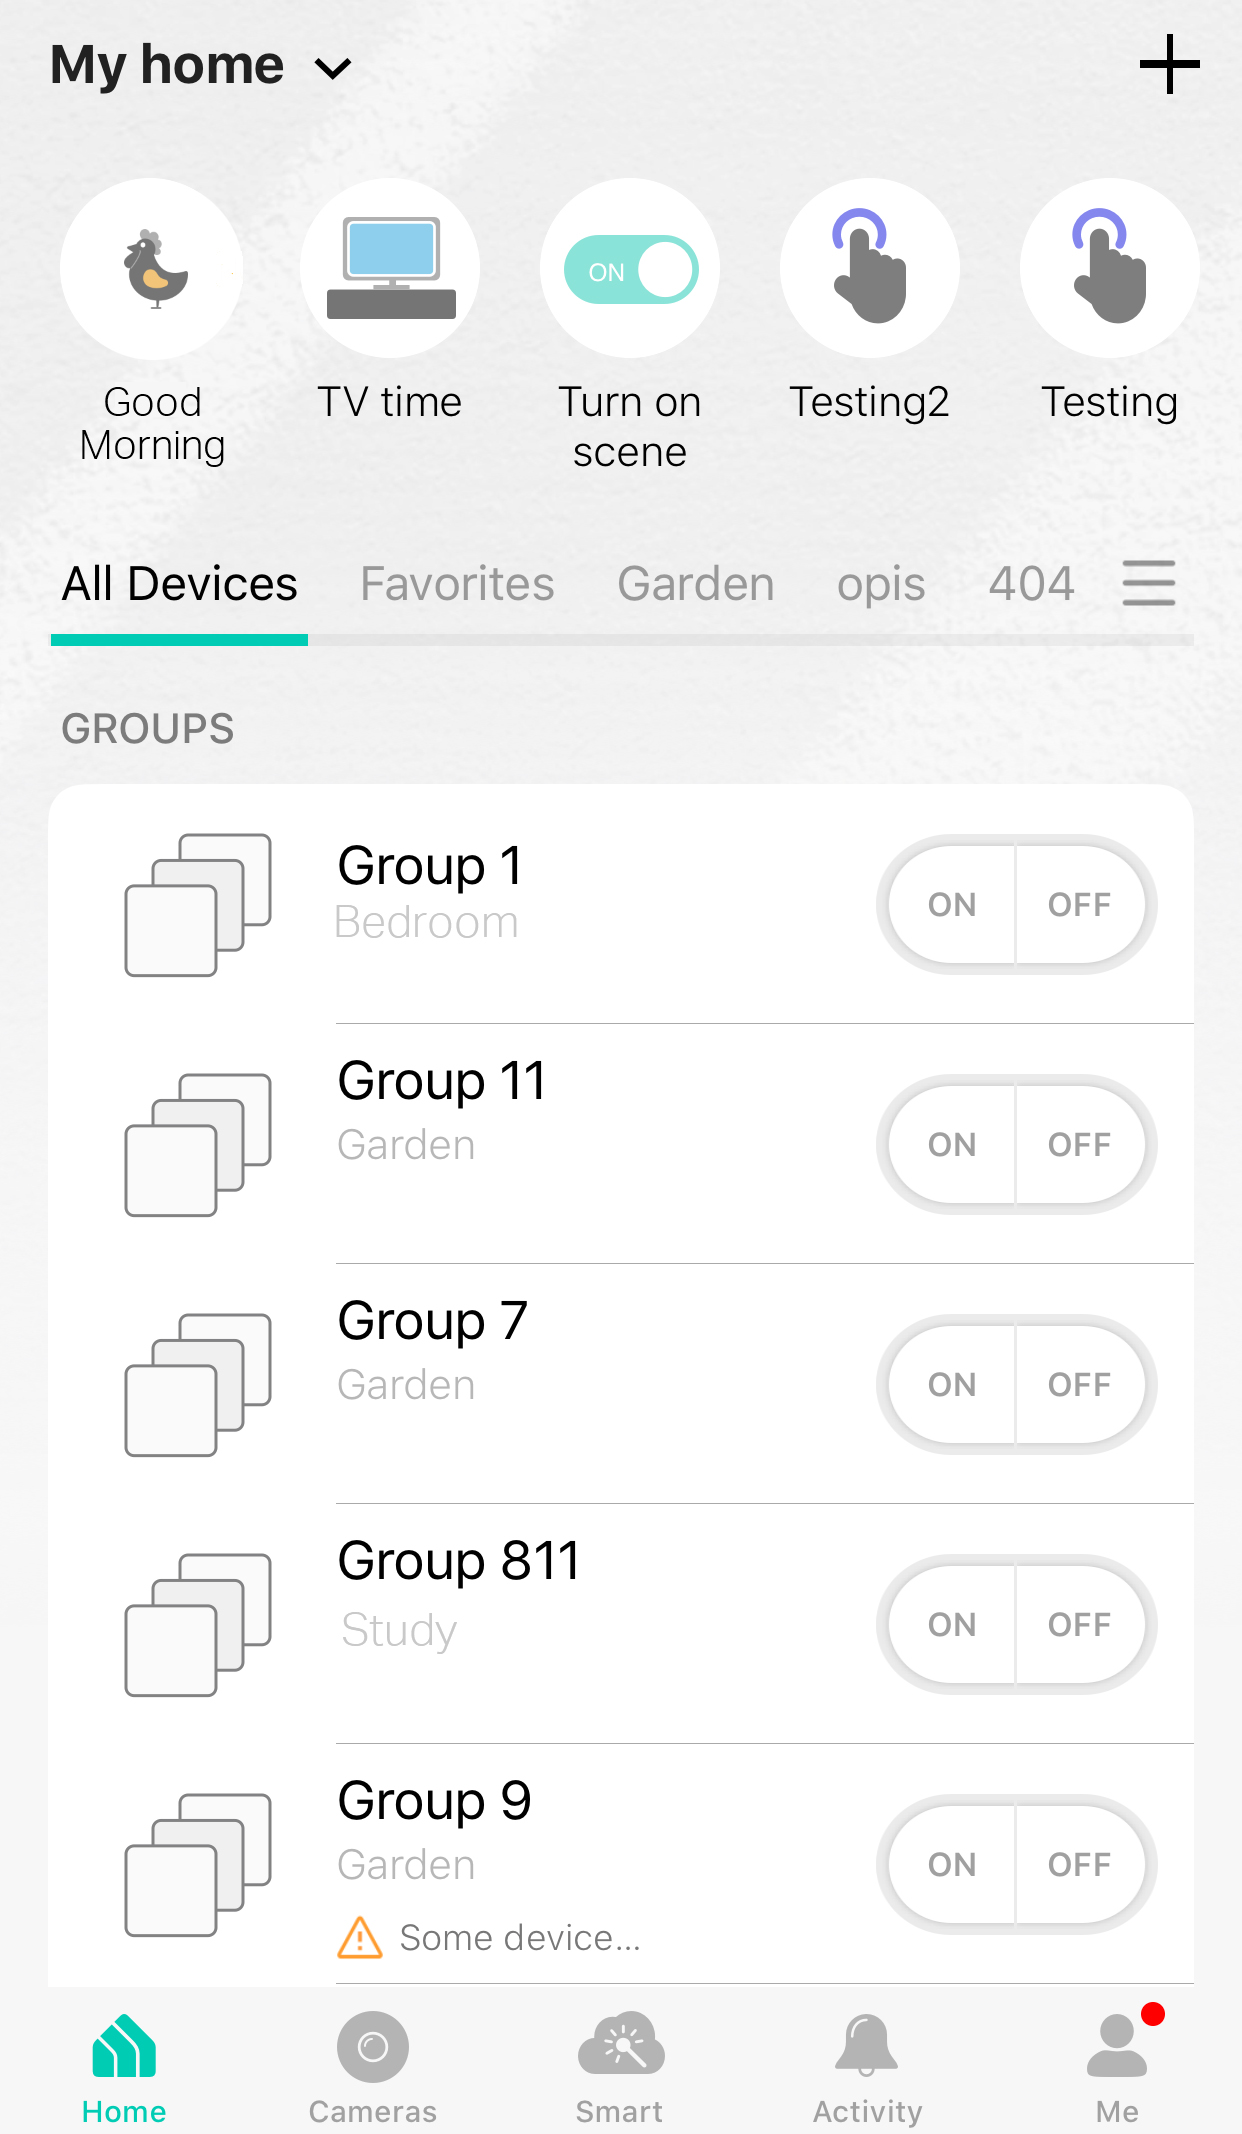
Finally, tap “Done” to finish the setup process. You can check your set scene on the top of the home page and edit it via “Smart > Scenes”.
Podobne FAQ
Więcej
Czy ten poradnik FAQ był pomocny?
Twoja opinia pozwoli nam udoskonalić tę stronę.
Jakie są Twoje uwagi dotyczące tego artykułu?
- Niezadowolenie z produktu
- Zbyt skomplikowany
- Mylący tytuł
- Nie dotyczy mnie
- Zbyt ogólnikowy
- Inne
Dziękujemy
Dziękujemy za przesłanie opinii.
Kliknij tutaj, aby skontaktować się ze Wsparciem technicznym TP-Link.
z United States?
Uzyskaj produkty, wydarzenia i usługi przeznaczone dla Twojego regionu.
Ta witryna wykorzystuje tzw. pliki cookies, aby usprawnić jej przeglądanie, w celu analizy ruchu oraz do jak najlepszej optymalizacji wyświetlanych treści. W każdej chwili można wyłączyć obsługę plików cookies. Więcej informacji na ten temat dostępnych jest w Polityce prywatności
Your Privacy Choices
Ta witryna wykorzystuje tzw. pliki cookies, aby usprawnić jej przeglądanie, w celu analizy ruchu oraz do jak najlepszej optymalizacji wyświetlanych treści. W każdej chwili można wyłączyć obsługę plików cookies. Więcej informacji na ten temat dostępnych jest w Polityce prywatności
Te pliki cookies niezbędne są do poprawnego działania witryny i nie moga zostać wyłączone.
TP-Link
accepted_local_switcher, tp_privacy_banner, tp_privacy_base, tp_privacy_marketing, tp_top-banner, tp_popup-bottom, tp_popup-center, tp_popup-right-middle, tp_popup-right-bottom, tp_productCategoryType
Youtube
id, VISITOR_INFO1_LIVE, LOGIN_INFO, SIDCC, SAPISID, APISID, SSID, SID, YSC, __Secure-1PSID, __Secure-1PAPISID, __Secure-1PSIDCC, __Secure-3PSID, __Secure-3PAPISID, __Secure-3PSIDCC, 1P_JAR, AEC, NID, OTZ
Analiza - Te pliki Cookies są wykorzystywane w celu analizy ruchu na naszej stronie, co umożliwia poprawę i dostosowanie wyświetlanych treści.
Marketing - Te pliki Cookies mogą być wykorzystywane przez naszych partnerów reklamowych podczas tworzenia profilu Twoich zainteresowań, co pozwala na wyświetlanie odpowiednich reklam na innych stronach.
Google Analytics & Google Tag Manager
_gid, _ga_<container-id>, _ga, _gat_gtag_<container-id>
Google Ads & DoubleClick
test_cookie, _gcl_au
Meta Pixel
_fbp
Crazy Egg
cebsp_, _ce.s, _ce.clock_data, _ce.clock_event, cebs
lidc, AnalyticsSyncHistory, UserMatchHistory, bcookie, li_sugr, ln_or