View Continuous Recordings from Your Tapo Camera/Doorbell on the Tapo App
Continuous recording captures non-stop footage from your Tapo cameras and doorbells, so you can go back and review any timeframe you choose. All recordings are stored locally on a microSD card (sold separately) or through a Tapo Hub, and accessed through the Tapo app. Before you can play back footage, continuous recording must be supported by your device and enabled in the app.
Key Takeaways
- A microSD card (sold separately) or a Tapo Hub is required to use the continuous recording feature on your camera or doorbell.
- Battery-powered cameras and doorbells do not support continuous recording.
- The steps for enabling and viewing recordings are the same for cameras and doorbells.
- Your camera or doorbell detects motion automatically, but does not record continuously unless Continuous Recording is turned on in your device settings.
Requirements
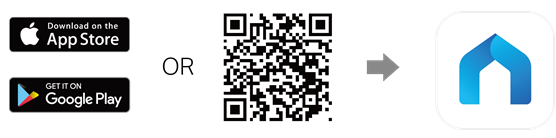
Before you begin, download the Tapo app from the Google Play Store or App Store, or by scanning the QR code.
A microSD card (sold separately) or a Tapo Hub is also required to enable the continuous recording feature for your camera or doorbell.
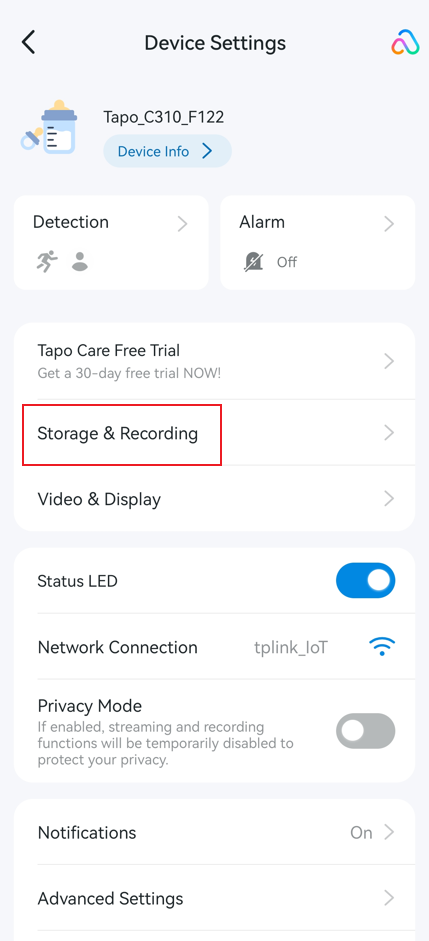
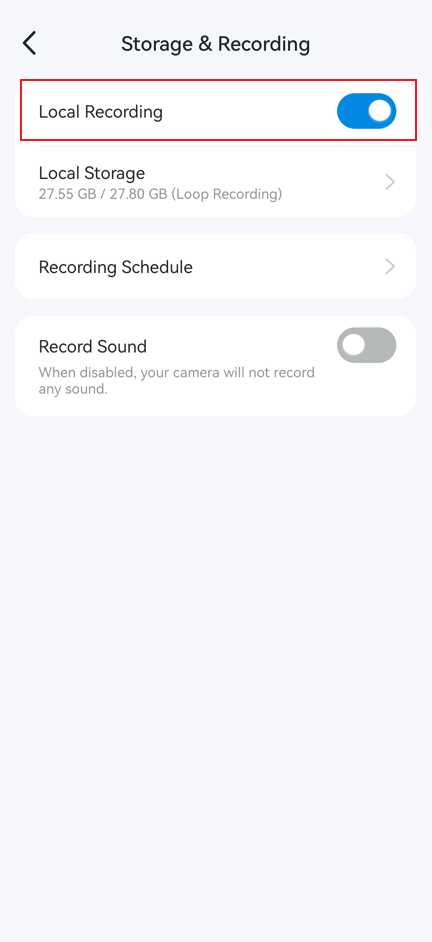
Step 1: Enable Local Recording in Device Settings
Open the Tapo app and tap your camera or doorbell device card on the Home page to enter the Live View. Tap the gear icon in the top right corner to open Device Settings. Tap Storage & Recording, then enable Local Recording.
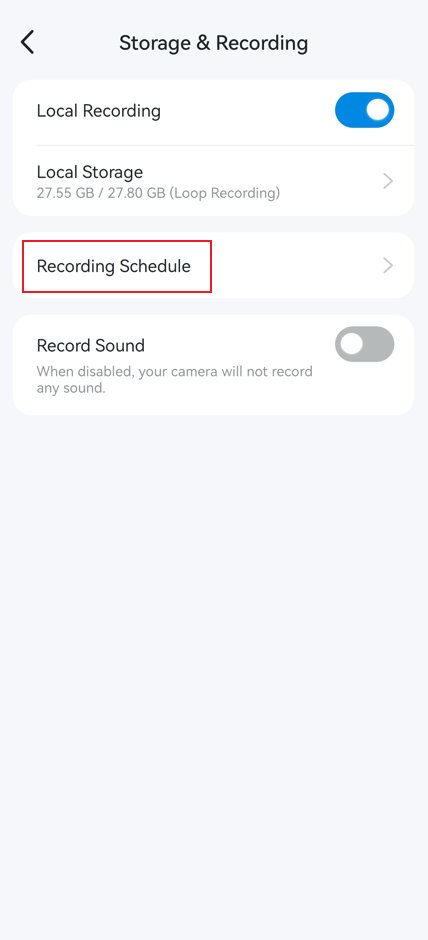
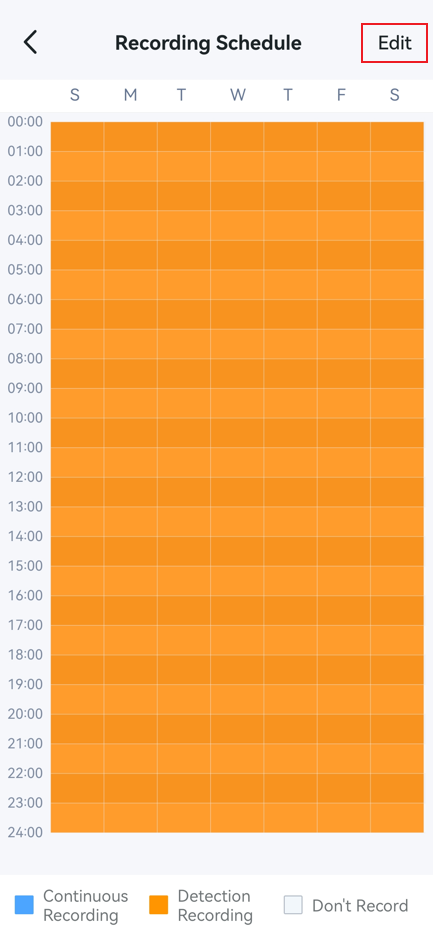
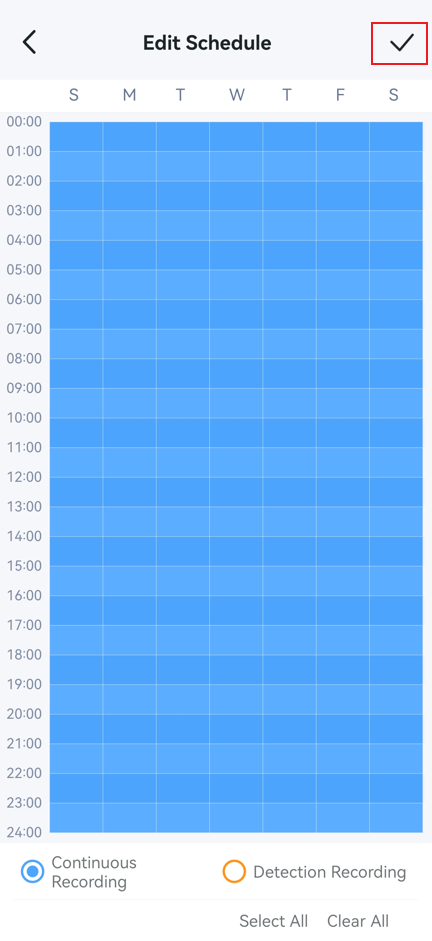
Step 2: Set Your Recording Schedule
Tap Recording Schedule to open the schedule settings. Here you can configure two recording modes for any time slot across the week:
- Continuous Recording records footage without interruption during the scheduled hours.
- Detection Recording records only when the camera detects motion or another trigger event. This uses less storage but will have gaps in coverage between detection events.
Tap any time block to assign it to Continuous Recording, Detection Recording, or no recording at all. When you are done, tap the check icon in the top right corner to save your changes.
Note: Battery-powered cameras and doorbells (such as Tapo C420, C400, D230, and others) do not support Continuous Recording. If your device is battery-powered, the Recording Schedule option will not appear.
Step 3: View Your Continuous Recordings
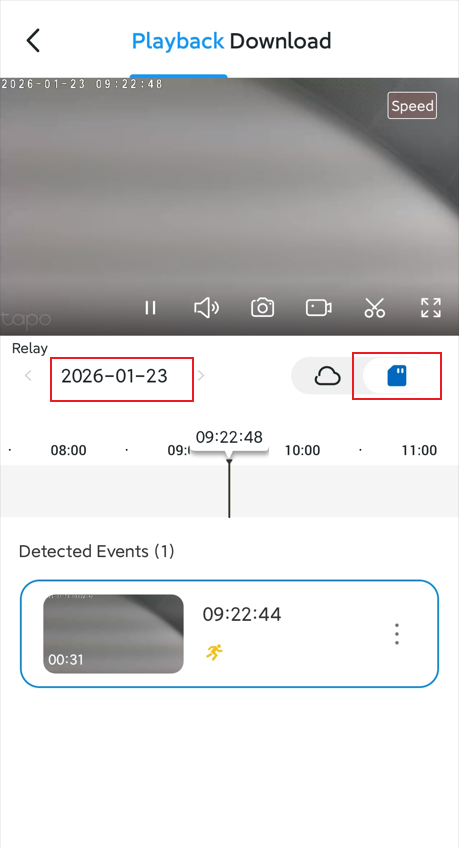
To find and play back your Tapo camera continuous recording, navigate to your camera's Live View page and tap Playback & Download. On the Playback page, tap the SD Card icon, then select a date. Drag the timeline to navigate to the timeframe you want to review.
Troubleshooting Common Playback Issues
No recordings showing up: First, confirm that Local Recording is enabled in Device Settings > Storage and Recording. If the SD card is not being recognized or cannot be formatted, see SD card troubleshooting for Tapo and Kasa cameras.
Missing footage or gaps in the timeline: Check your Recording Schedule settings. Gaps in footage typically mean those time slots are set to Detection Recording or no recording. Switch the relevant time blocks to Continuous Recording if you need uninterrupted footage.
Continuous Recording option is not visible: Your device may not support continuous recording. Battery-powered cameras and doorbells do not include this feature. To confirm compatibility, check your product's specifications on the TP-Link website. You can also review microSD card compatibility for Tapo and Kasa cameras to ensure your card meets the requirements.
Not sure where to find the recordings section: From your camera's Live View, tap Playback & Download to reach the Playback screen. Select SD Card, choose a date, and drag the timeline to scroll through your recordings.
For more troubleshooting details, see what should I do if I encounter issues while playing back videos from an SD card?
Is this faq useful?
Your feedback helps improve this site.


TP-Link Community
Still need help? Search for answers, ask questions, and get help from TP-Link experts and other users around the world.