How to Share Your VIGI Devices with Your Families and Employees

VIGI C400HP( V2 ) , VIGI NVR4032H , VIGI C340HPWSM , VIGI NVR4016H , VIGI C540HPWSM , VIGI NVR2008H-8MP , InSight S345-4G , VIGI NVR1004H-4MP , VIGI NVR2016H-16P , VIGI C540V , VIGI C540S , VIGI C250 , VIGI C450 , VIGI C330 , VIGI C330I , VIGI C455 , VIGI C440HWSM-W4 , VIGI NVR1008H( V2 V2.20 ) , VIGI C230I Mini , VIGI NVR1004H , VIGI NVR1016H , VIGI NK8P-B434I , VIGI C580-W , InSight S655I , VIGI NVR1008H-8P , VIGI C340 , VIGI C540-4G , VIGI NVR2016H , VIGI C340-W , VIGI C540 , VIGI C385 , VIGI C420 , VIGI C430I , VIGI C220I , VIGI C240I , VIGI NVR2016H-16MP-4TB , VIGI C440-W , VIGI NVR1008H-8MP , VIGI C540HWSM-W4 , VIGI NVR1008 , VIGI NK8P-B43I4 , VIGI C340S , VIGI NK4P-T4425-2T , VIGI C540-W , VIGI C230 , VIGI C350 , VIGI C430 , VIGI NVR1104H-4P , VIGI C355 , VIGI C320I , VIGI SP9030 , VIGI NVR2016H-16MP , VIGI C340I , VIGI SP6020 , VIGI C580-4G , VIGI C420I , VIGI C340HWSM-W4 , EasyCam C320 , VIGI NVR1004H-4P , VIGI C300HP( V2 ) , VIGI C340 (VIGI C340HPWSM) , VIGI C240 , VIGI C485 , VIGI NVR2008H-8MP-2TB , VIGI C440 , VIGI C440I , VIGI C445 , VIGI C230I , VIGI SP6030
Recent updates may have expanded access to feature(s) discussed in this FAQ. Visit your product's support page, select the correct hardware version for your device, and check either the Datasheet or the firmware section for the latest improvements added to your product. Please note that product availability varies by region, and certain models may not be available in your region.
With the Device Sharing feature, you can invite your families to manage the VIGI devices together.
Note:
1. Make sure the firmware of VIGI device and VIGI App are both up to date.
2. Some devices do not support the sharing feature for the time being. And the APP will prompt that the sharing feature is not supported.
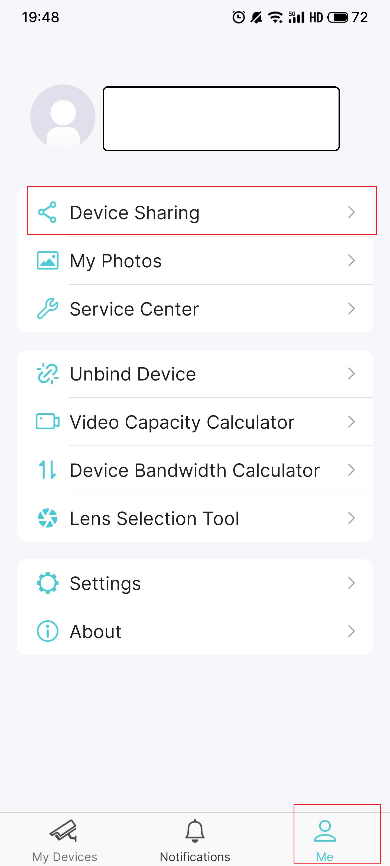
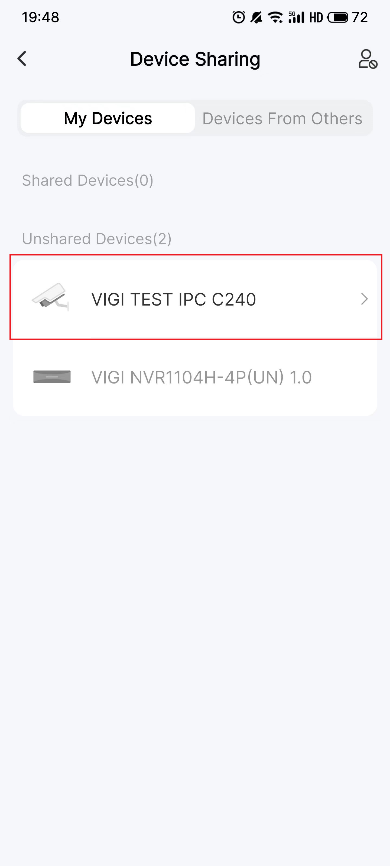
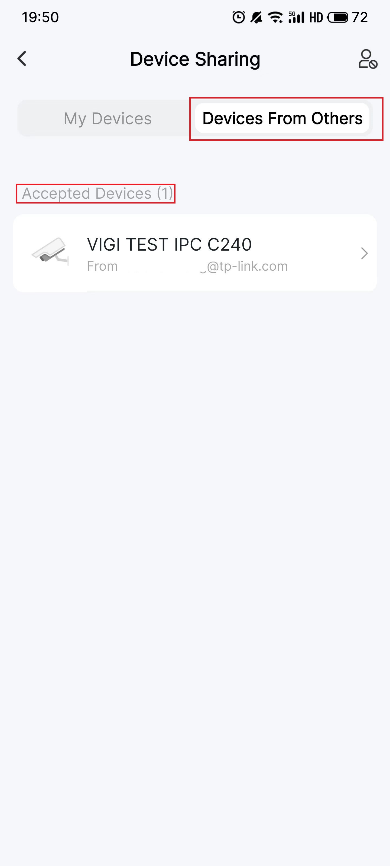
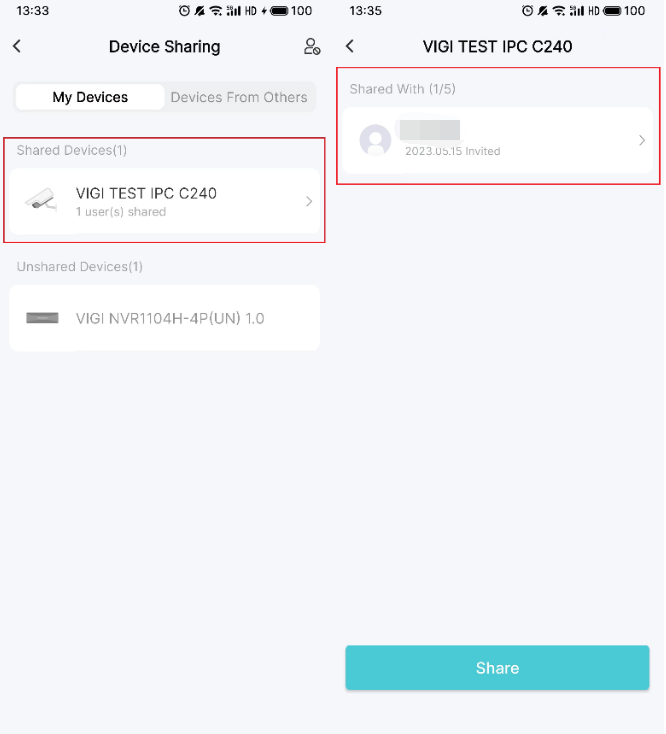
Step 1. On the Me page, tap Device Sharing and select the device you want to share.
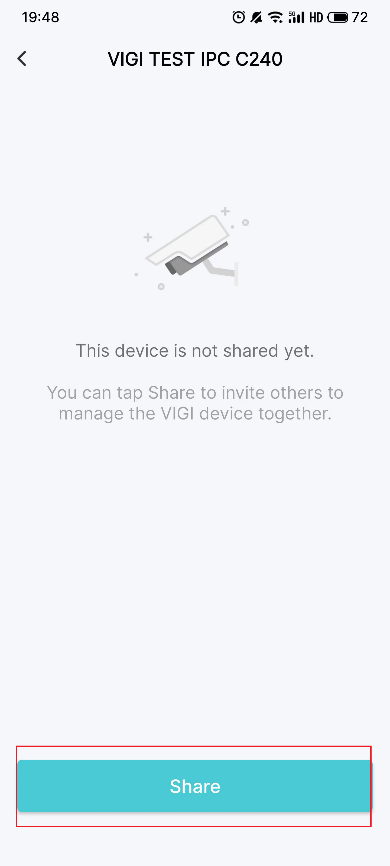
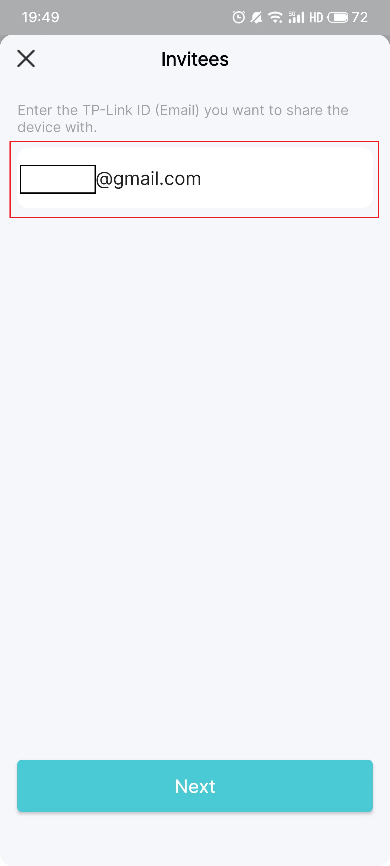
Step 2. Tap Share. Enter the invitee’s TP-Link ID, then tap Next.
If the invitee is new to TP-Link, please refer to the link to register your TP-Link ID: What is TP-Link ID and how to create a TP-Link ID?
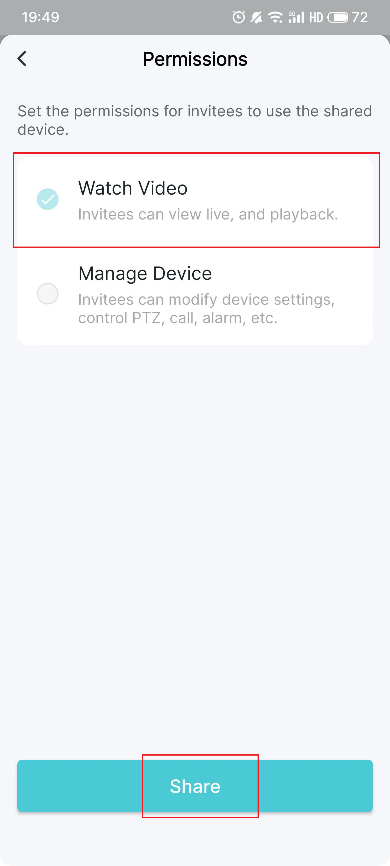
Step 3. Set the Permissions for the invitees. Note that there are two different permissions for your invitees. Watch Video will restrict their privilege to only watch live and playback. If you want to give permission to your invitee for control your VIGI devices, please assign Manage Device.
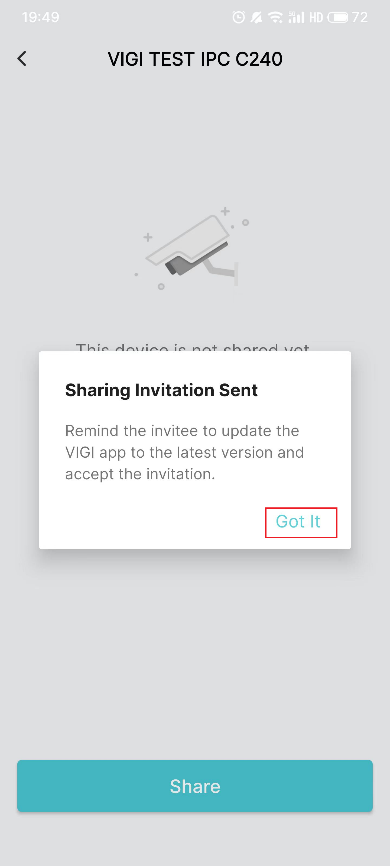
After selecting the permission for your invitee, click Share and Got It. Now the invitee can view the camera now.
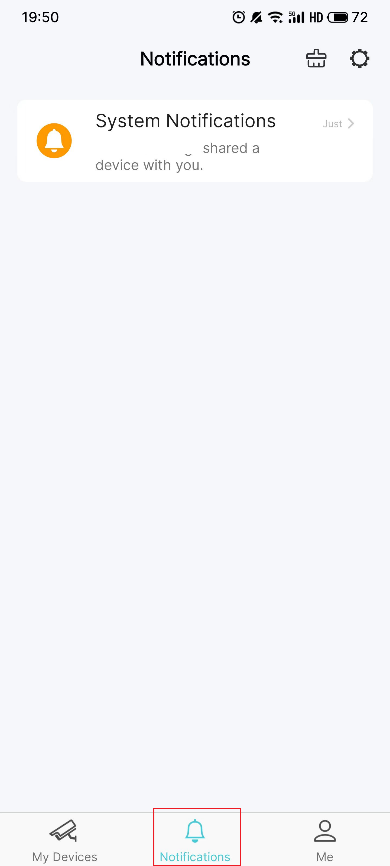
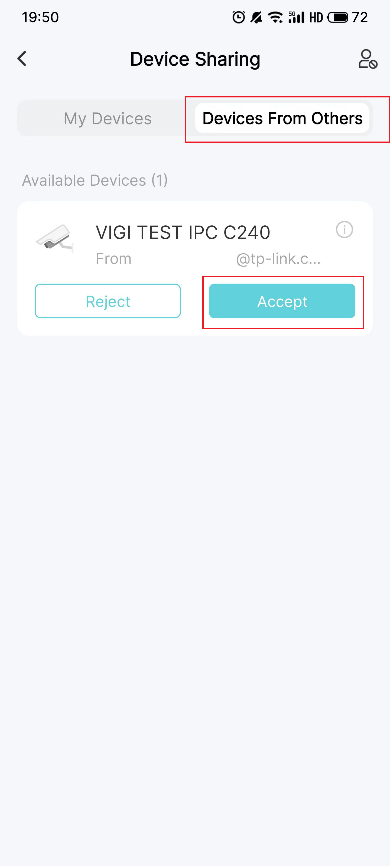
Step 5. Let the invitee log in to the VIGI app, check the invitation under Notifications and tap Accept. After that, the invitee can watch/manage this shared VIGI device.
How to stop the device sharing
If you want to stop this Device Sharing, go to Me > Device Sharing > Shared Devices. Tap on the device that you want to stop sharing. Tap Delete and confirm your deletion.
Please contact TP-Link technical support with the following information if you cannot share VIGI devices.
1) Your TP-Link ID or cloud account; invitee’s TP-Link ID;
2) The model number of your VIGI device and its firmware version;
3) VIGI APP version.
Finden Sie diese FAQ hilfreich?
Mit Ihrer Rückmeldung tragen Sie dazu bei, dass wir unsere Webpräsenz verbessern.
Was ist Ihr Bedenken bei diesem Artikel?
- Mit Produkt unzufrieden
- Zu kompliziert
- Irreführende Titel
- Betrifft mich nicht
- Zu ungenau
- Was anderes
Vielen Dank.
Vielen Dank für Ihr Feedback.
Von United States?
Erhalten Sie Produkte, Events und Leistungen speziell für Ihre Region
Diese Webseite verwendet Cookies, um die Websitenavigation zu verbessern, Online-Aktivitäten zu analysieren und die bestmögliche Nutzererfahrung auf unseren Webseiten zu haben. Sie können der Verwendung von Cookies jederzeit Widersprechen. Nähere Informationen finden Sie in unseren Datenschutzhinweisen.
Notwendige Cookies
Diese Cookies sind zur Funktion der Website erforderlich und können in Ihren Systemen nicht deaktiviert werden.
TP-Link
SESSION, JSESSIONID, accepted_local_switcher, tp_privacy_base, tp_privacy_marketing, tp_smb-select-product_scence, tp_smb-select-product_scenceSimple, tp_smb-select-product_userChoice, tp_smb-select-product_userChoiceSimple, tp_smb-select-product_userInfo, tp_smb-select-product_userInfoSimple, tp_top-banner, tp_popup-bottom, tp_popup-center, tp_popup-right-middle, tp_popup-right-bottom, tp_productCategoryType
Youtube
id, VISITOR_INFO1_LIVE, LOGIN_INFO, SIDCC, SAPISID, APISID, SSID, SID, YSC, __Secure-1PSID, __Secure-1PAPISID, __Secure-1PSIDCC, __Secure-3PSID, __Secure-3PAPISID, __Secure-3PSIDCC, 1P_JAR, AEC, NID, OTZ
Zendesk
OptanonConsent, __cf_bm, __cfruid, _cfuvid, _help_center_session, _pendo___sg__.<container-id>, _pendo_meta.<container-id>, _pendo_visitorId.<container-id>, _zendesk_authenticated, _zendesk_cookie, _zendesk_session, _zendesk_shared_session, ajs_anonymous_id, cf_clearance
Analyse- und Marketing-Cookies
Analyse-Cookies ermöglichen es uns, Ihre Aktivitäten auf unserer Website zu analysieren, um die Funktionsweise unserer Website zu verbessern und anzupassen.
Die Marketing-Cookies können über unsere Website von unseren Werbepartnern gesetzt werden, um ein Profil Ihrer Interessen zu erstellen und Ihnen relevante Anzeigen auf anderen Websites zu zeigen.
Google Analytics & Google Tag Manager
_gid, _ga_<container-id>, _ga, _gat_gtag_<container-id>
Google Ads & DoubleClick
test_cookie, _gcl_au